Installing a New Moodle Website on a VPS
How to provision a new VPS, configure Virtualmin, set up DNS and virtual hosts, and complete a fresh Moodle installation from scratch.

Setting up a new Moodle instance on a VPS requires careful configuration of DNS, virtual hosts, and web server settings. This guide covers the complete workflow from domain setup through initial Moodle installation.
1. Create a DNS record
There are two options here (described in more detail below):
- The customer has access to their own DNS server or provides you with access data: link their preferred (sub)domain to the ip address of your VPS server.
- Create a DNS Record for a Subdomain under Our Domain: this means that you have to adjust the DNS settings for one of your own domains, to link a subdomain to the VPS.
Link the Customer’s Preferred (sub)domain to the IP Address of your VPS Server
If your users already has a (sub)domain name for their new Moodle installation, you have to go into their own DNS server and create the necessary changes. Since there’s no telling what DNS server or provider they’re using, the exact steps vary by DNS provider.
The outcome should usually be an A record that links their (sub)domain to the ip address of your server:
lms.westwood.com. IN A 123.456.789.101In short: their (sub)domain should be link to our ip address.
Create a DNS Record for a Subdomain under Our Domain
2. Create a VirtualHost
Log in to Virtualmin on the your-vps server: https://198.51.100.42:10000/?virtualmin.
Then select “Create Virtual Server”:
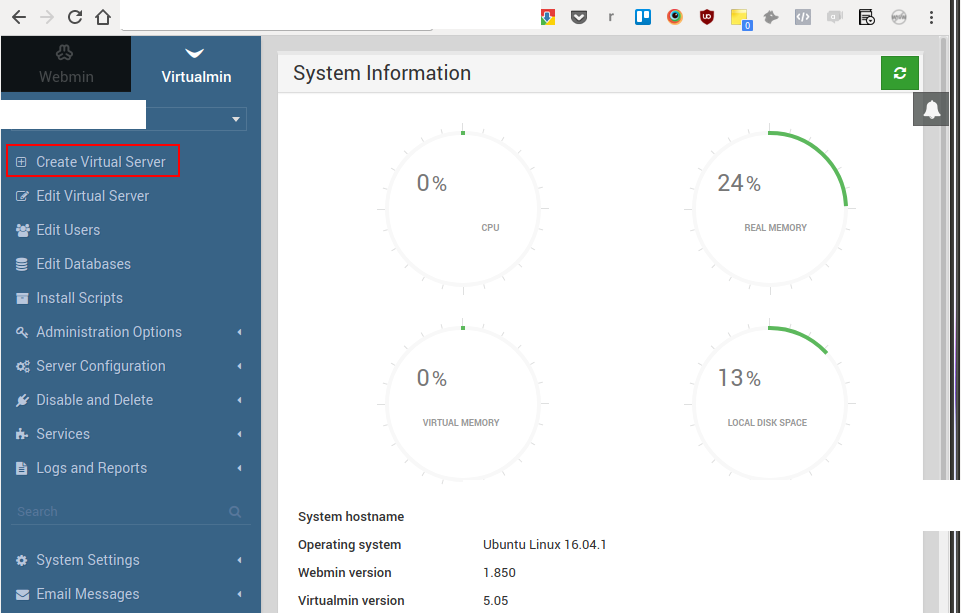
Input the details for the new virtualhost:

Please note:
- Use the subdomain as the Administration username (use the “Custom username” feature). E.g. if the domain is westwood.example-lms.com, then ‘westwood’ becomes the Administration username.
- Create a strong, random password and store it in a very secure password wallet (e.g. KeePassX).
- If you use Virtualmin, be sure to adapt the quota (usually 1GB by default) – otherwise larger Moodle installations will run into the limit. (MySQL server will even crash entirely if you try to import data beyond the quota limit. I once had to manually delete the database directory from /var/lib/mysql/ to get it working again, because the MySQL server wouldn’t even start in recovery mode.) To double check whether a quota limit applies:
root@yourserver:~# quota -u example-dbDisk quotas for user example-db (uid 1020): none- If the database creation fails for some reason, simply use:
create database mydatabasename character set utf8mb4 collate utf8mb4_unicode_ci;
3. Set the Database Password
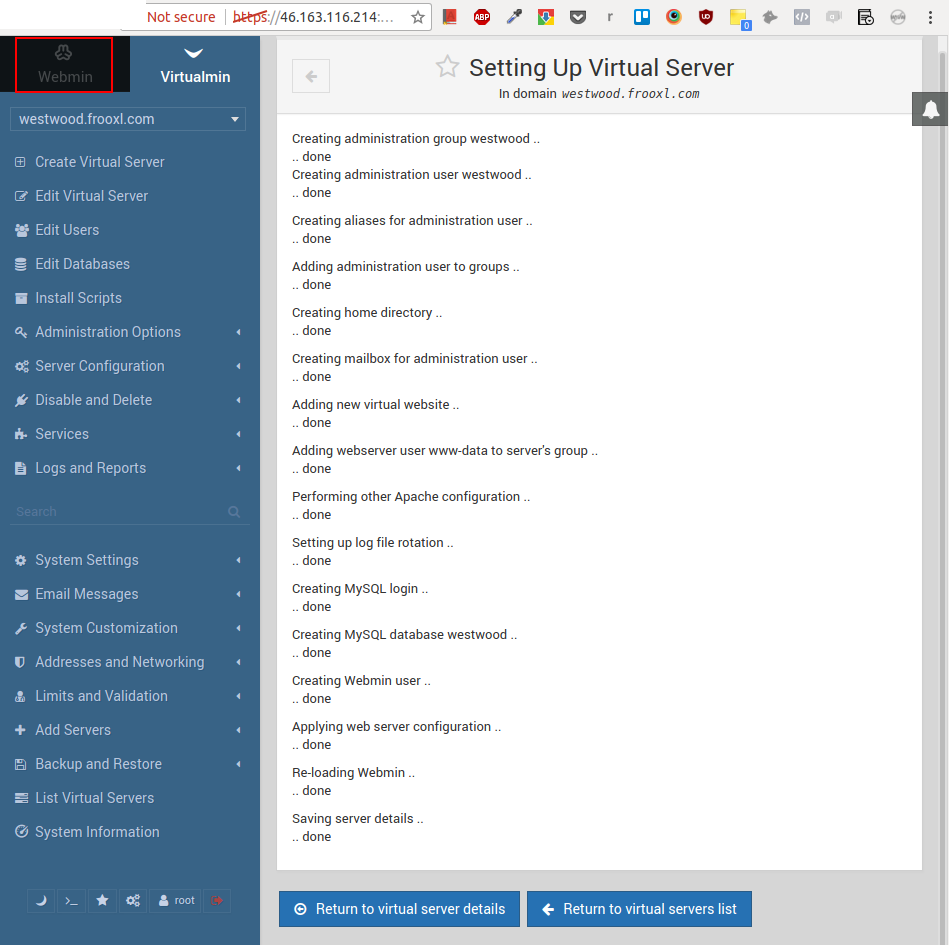
After completing the previous step, click “Create Server” (see previous screenshot).
If the virtual server has been set up, click on “Webmin” in the top left corner of the window:
In the blue panel on the left, select “Servers” > “MySQL Database Server. Then scroll down and click “User Permissions” (Under “Global Options”)::
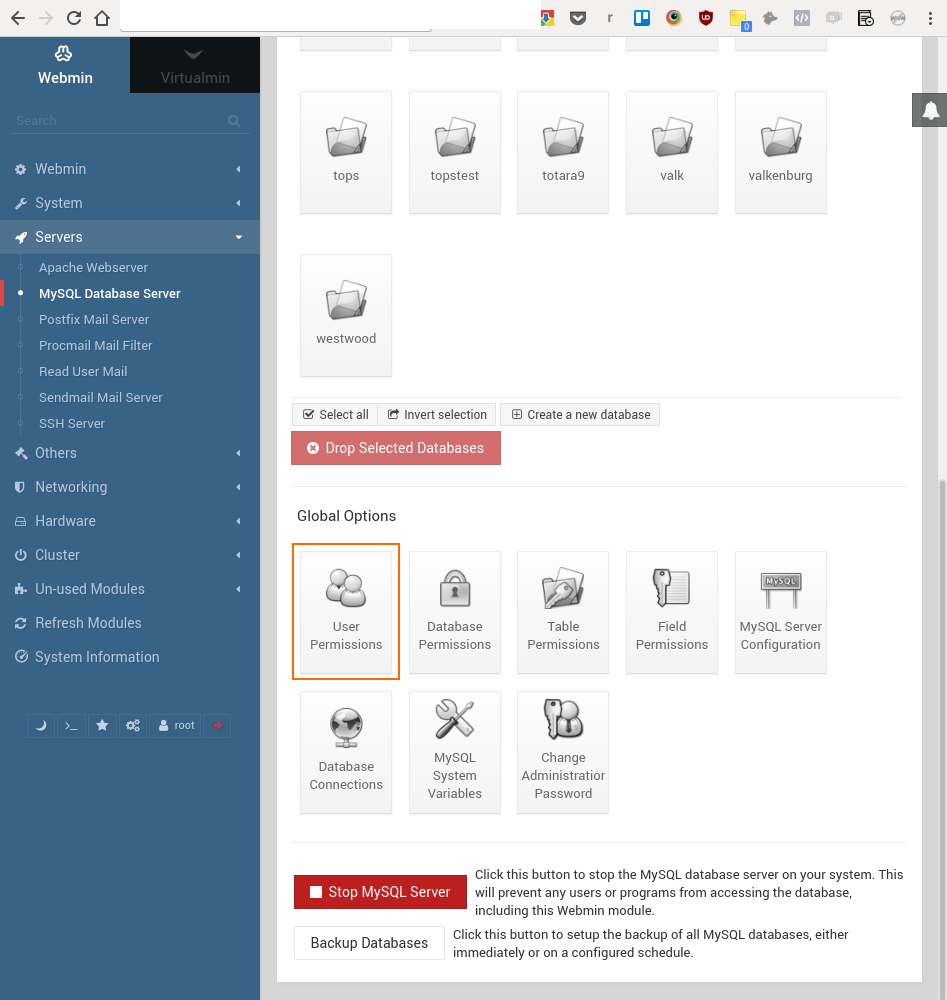
Then click on the database user with the name of the new subdomain (i.e. the Administration username), Westwood in this example:
Now type in a strong, random password and store that password in your password wallet (e.g. KeePassX):
Click “Save” to complete this step.
Solving Database Connection Errors
If you run into any database connection problems, they may be due to using a recent MySQL version and an older Moodle version. Here are the known issues we have run into:
- Authentication issue when using ‘traditional’ native MySQL native password
- Using Moodle 2.x with MySQL 8
Authentication Issue
Add default-authentication-plugin=mysql_native_password to the [mysqld] section of /etc/mysql/mysql.conf.d.Change the authentication method for the database user:
ALTER USER example-db@localhost IDENTIFIED WITH mysql_native_password BY 'thepassword';Using Moodle 2.x with MySQL 8
If you are using a very old Moodle version, such as 2.x, together with a newer version of MySQL, e.g. version 8, then you will need to make some changes to the source code. You will also need to address the authentication mentioned above.
Change the code in lib/dml/mysqli_native_moodle_database.php, line 523:
$sql = "SELECT column_name as `column_name`, data_type as `data_type`, character_maximum_length as `character_maximum_length`, numeric_precision as `numeric_precision`, numeric_scale as `numeric_scale`, is_nullable as `is_nullable`, column_type as `column_type`, column_default as `column_default`, column_key as `column_key`, extra as `extra`
 FROM information_schema.columns
To summarize: add aliases for every single column name.
It may also be necessary to make an additional change if you get the error message Unknown system variable 'storage_engine'.
Fix this issue by editing lib/dml/mysqli_native_moodle_database.php. Replace:
@@storage_enginewith
@@default_storage_engine(In two places, in this case.)
There will still be a notice:
Notice: Undefined index: engine in /home/example-client/public_html/lib/dml/mysqli_native_moodle_database.php on line 173But that will be ignored if you turn off full debugging mode.
For Totara: Grant Permissions to Create Tables & Indexes
If you’re installing Totara, please make sure the database user has adequate permissions to create caching tables and indexes. (For the report builder.)
Using The MySQL Client To Create Database And DB User
Instead of using Webmin, you can also use the commandline tool mysql:
mysql -u root -p
CREATE DATABASE moodle_db DEFAULT CHARACTER SET utf8mb4 COLLATE utf8mb4_unicode_ci;
CREATE USER 'moodle_user'@'localhost' IDENTIFIED BY 'your_strong_password';
GRANT ALL PRIVILEGES ON moodle_db.* TO 'moodle_user'@'localhost';
FLUSH PRIVILEGES;
4. Create a Git Repository
Before we install or deploy the code for the new Moodle website, we need to set up a Git repository. In this guide this guide uses Bitbucket to store the remote repository, but any other system is fine too (e.g. Gitlab or Github).
New Bitbucket Repository
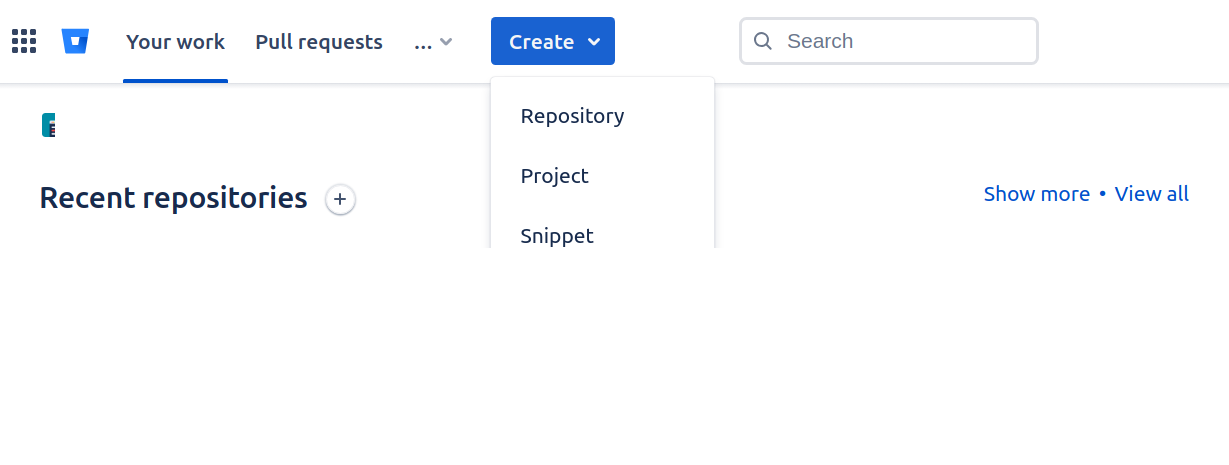
On Bitbucket.com, use the ‘Create’ button to add a new repository:
Bitbucket will also ask you to create a Project. Lately, I’ve made it a habit to use your users’s name for the project, and your users’s name for their platform (Moodle or Totara) as the name for the repository.
Clone Repo and Get the Moodle Code
On your local machine, clone the repo. Then add the Moodle repo as the upstream repo:
git remote add upstream https://github.com/moodle/moodle.gitGet a specific branch. Here, we pull the current LTS branch (check the upstream repo for the latest stable branch name; at the time of writing the LTS is Moodle 4.5, so the branch is MOODLE_405_STABLE):
git pull upstream MOODLE_405_STABLECreate a local branch based on the upstream branch:
git checkout upstream/MOODLE_405_STABLE
git switch -c moodle45
Go to master branch:
git checkout master(Bitbucket uses main by default nowadays.)
Then copy all the files from moodle41 to the current branch:
git checkout moodle41 .Yes, this looks like we’re switching to another branch altogether, but notice the dot. This apparently means: get the files from branch moodle41 and put them in the currently checked out branch (which is the master branch in this example).
After you’re done, commit and push the changes to remote.
Please note that we can’t add the Totara source code in this way because Totara is not really open source: there is no publicly available Git repository for it.
Caveat: 3rd Party Plugins
Please note: the method described above also works if you allow users to install their plugins (through the standard Moodle interface). But you wouldn’t have the complete code base in your git repo of course.
It’s probably a better idea to use git submodules if you want to be able to upgrade 3rd party (“additional”) plugins through git as well. See the explanation here: https://docs.moodle.org/401/en/Git_for_Administrators#Maintaining_Git_submodules.
However, this still needs to be executed on your local machine since it requires a commit afterwards. From the link above:
$ cd /path/to/your/moodle
$ git submodule foreach git pull
The command git submodule foreach [another command] walks through all submodule repositiories and executes what is specified by [another command]. In this case it is git pull. Therefore, the module mylittleextension was updated and the main repository isn't clean anymore until changes are committed:
$ git commit -a -m "Plugin updates"Since the git users on the live servers do not have write access to the repository, we can’t do the above on the live server itself. (We don’t want to give them write access because their private ssh keys are on the web server, accessible for everyone on that server).
Add Public Key of Vhost’s Unix User to Bitbucket
We are going to use Git to deploy the new code (and also later, e.g. for minor and major Moodle upgrades). Login on the web server and:
- su to the unix user for the website
- Execute the following command:
ssh-keygen - Skip the passphrase – we don’t want to use a passphrase (but only in this case)
- Put the public key in Bitbucket repo through “Repository settings > Access keys”
- Provide a clear label, e.g. “mbcc user on your-vps”
- Clone the repository: ‘
git clone’. Make sure the directory containing the git repository is the webroot (usually calledpublic_htmlorhtdocs) - Set the permissions, e.g.:
chmod -R 755 public_html - Secure the .git folder by doing a
chmod -R 700 .git(we’ve had complaints from security officers that the .git folder was public, even though what’s in it is typically public anyway since it’s open source software).
5. Install & Configure Moodle
- Make sure the (sub)domain can be reached, e.g.:

You will get an error message ‘Forbidden’, but that’s okay since there’s no actual website yet. If something went wrong, you’ll see a different message, e.g.: “This site can’t be reached”.
- Login to the VPS, e.g.:
engineer@opsbox-computer14:~$ ssh sysadmin@198.51.100.42
Welcome to Ubuntu 16.04.3 LTS (GNU/Linux 4.4.0-042stab123.9 x86_64)

 * Documentation:  https://help.ubuntu.com
 * Management:     https://landscape.canonical.com
 * Support:        https://ubuntu.com/advantage
Last login: Sun Aug 27 08:34:07 2017 from 83.162.44.210
sysadmin@yourserver:~$- Move to your users’s home directory:
sysadmin@yourserver:~$ cd /home/westwood
sysadmin@yourserver:/home/westwood$- Create a moodledata directory:
sysadmin@yourserver:/home/westwood$ sudo mkdir moodledata- If you have deployed the code through Git, which is the preferred way, you can skip ahead to step 11: Make a copy of public_html/config-dist.php. Otherwise, go to https://download.moodle.org/releases/latest/ and click on the download button for the package that is built weekly:

- (Cancel the download to your local machine.) Copy the download link:
- Use wget to download Moodle: sudo wget [the link]
sysadmin@yourserver:/home/westwood$ sudo wget https://download.moodle.org/download.php/direct/stable33/moodle-latest-33.tgz
--2017-08-27 08:58:10--  https://download.moodle.org/download.php/direct/stable33/moodle-latest-33.tgz
Resolving download.moodle.org (download.moodle.org)... 2400:cb00:2048:1::6814:ef, 2400:cb00:2048:1::6814:1ef, 104.20.0.239, ...
Connecting to download.moodle.org (download.moodle.org)|2400:cb00:2048:1::6814:ef|:443... connected.
HTTP request sent, awaiting response... 200 OK
Length: 44163286 (42M) [application/g-zip]
Saving to: 'moodle-latest-33.tgz'

moodle-latest-33.tgz                                 100%[======================================================================================================================>]  42.12M  39.8MB/s    in 1.1s

2017-08-27 08:58:11 (39.8 MB/s) - 'moodle-latest-33.tgz' saved [44163286/44163286]

sysadmin@yourserver:/home/westwood$- Rename the public_html to public_html.bak:
sysadmin@yourserver:/home/westwood$ sudo mv public_html public_html.bak- Extract the moodle code base:
sysadmin@yourserver:/home/westwood$ sudo tar -xf moodle-latest-33.tgz- Rename to public_html:
sysadmin@yourserver:/home/westwood$ sudo mv moodle public_html- Make a copy of public_html/config-dist.php:
sudo cp public_html/config-dist.php public_html/config.php- Edit the contents of public_html/config.php with your text editor, e.g. vim:
$CFG->dbtype    = 'mysqli';      // 'pgsql', 'mariadb', 'mysqli', 'mssql', 'sqlsrv' or
$CFG->dblibrary = 'native';     // 'native' only at the moment
$CFG->dbhost    = 'localhost';  // eg 'localhost' or 'db.isp.com' or IP
$CFG->dbname    = 'westwood';     // database name, eg moodle
$CFG->dbuser    = 'westwood';   // your database username
$CFG->dbpass    = 'the_secret_password';   // your database password
$CFG->prefix    = 'mdl_';       // prefix to use for all table names
$CFG->dboptions = array(
    'dbpersist' => false,       // should persistent database connections be
    'dbsocket'  => false,       // should connection via UNIX socket be used?
    'dbport'    => '',          // the TCP port number to use when connecting
    'dbhandlesoptions' => false,// On PostgreSQL poolers like pgbouncer don't
    'dbcollation' => 'utf8mb4_unicode_ci', // MySQL has partial and full UTF-8
);
$CFG->wwwroot   = 'http://westwood.example-lms.com';
$CFG->dataroot = '/home/westwood/moodledata';- The lines that need changing are highlighted. This is an excerpt from a config.php file, not a complete config.php file.. Do not replace the code of your config.php file with this code, but make the changes in the file itself (new code may have been added by the Moodle core team).
Secure the Moodle Installation
- Make sure the directories have the right permissions and ownership (for the username, we’re following the ‘westwood’ example – change this to match the client’s username):
sudo chown -R westwood:www-data public_htmlsudo chmod -R 0755 public_htmlsudo chown -R westwood:www-data moodledatasudo chmod -R 0750 moodledata
- Also consider closing public access to the .git folder if it’s in your webroot. Even though most of the code is open source, some clients are still paranoid about it.
- Go to the website to actually install Moodle. It should redirect you to /admin/index.php:
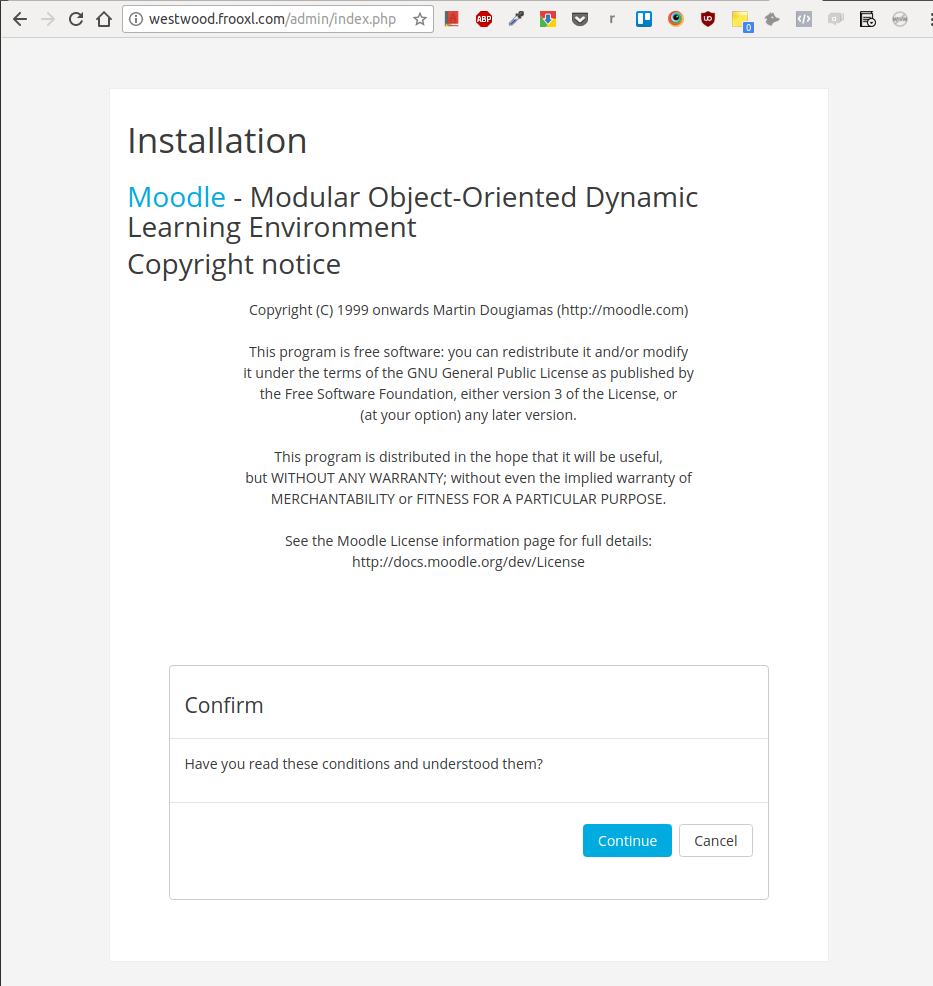
- Just follow the installation wizard from here on (ignore any notifications about https).
- In the installation form (see screenshot below):
- The username should be either siteadmin, yoursiteadmin or example-siteadmin (again, whatever is appropriate).
- Use admin@example-lms.com, admin@your-domain.com or admin@example.com as the admin’s email address (whatever is appropriate, e.g. if the site is Frooxl’s then it should be admin@example-lms.com).
- Set Email display to “Hide my email address from everyone”.
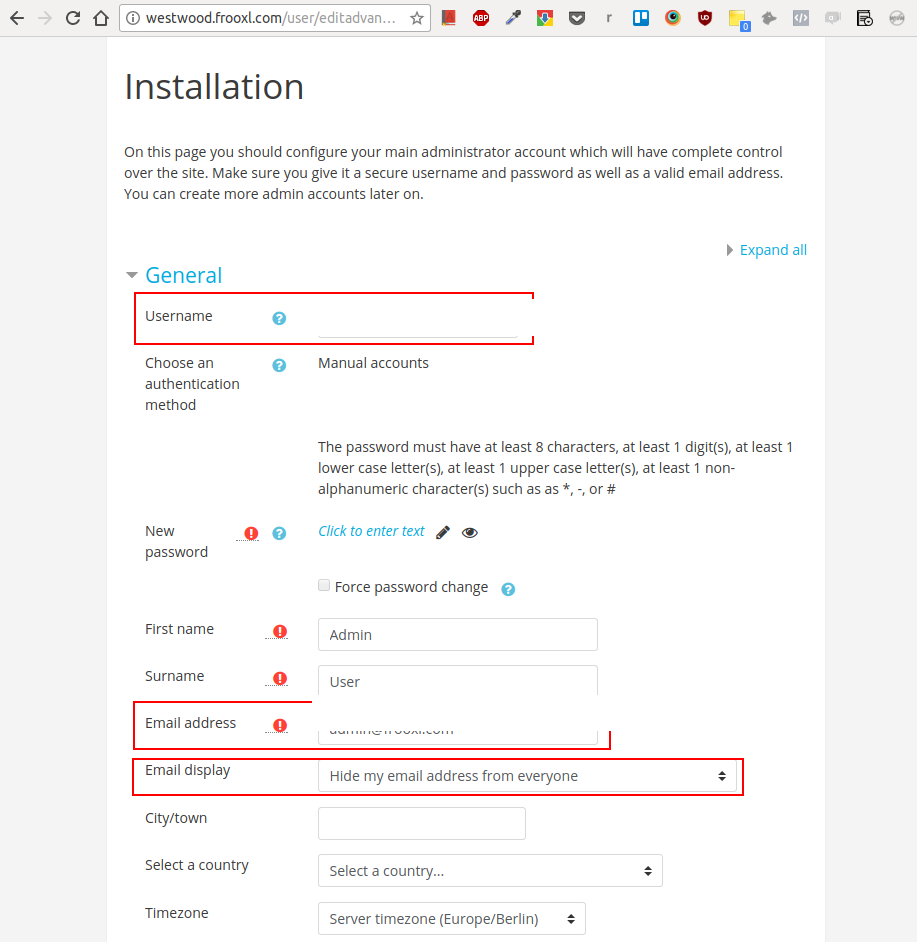
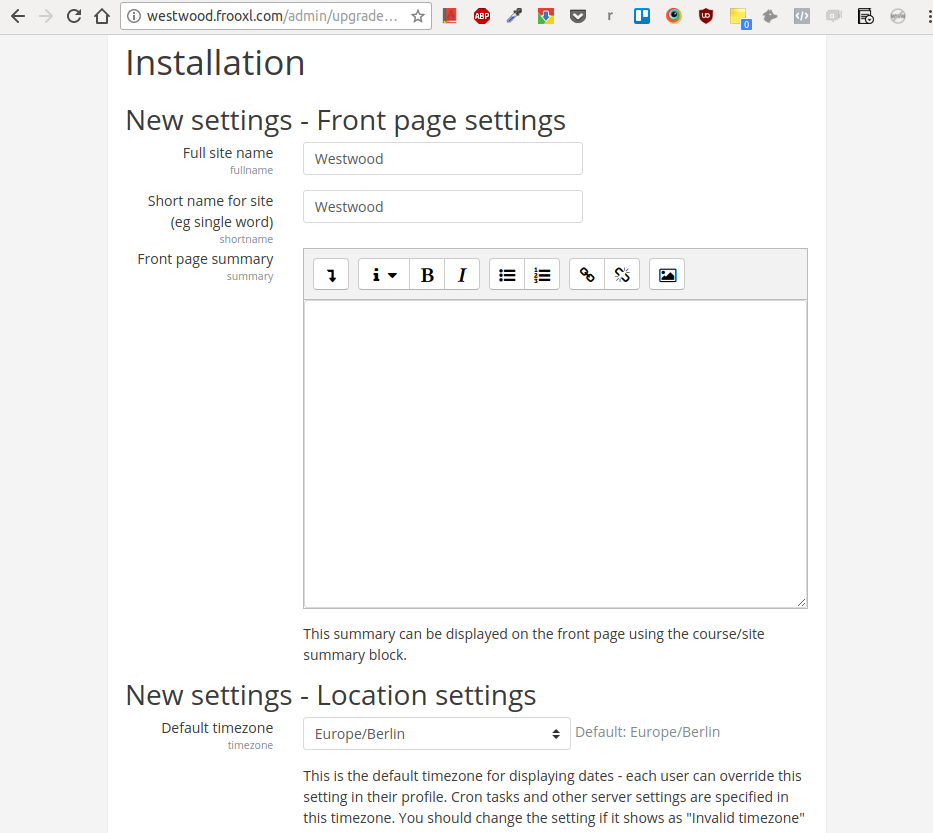
- For the Front page settings, use the subdomain name (or your users’s chosen name for the LMS) as the “Full site name” and the “Short name for site”. Set the “Default timezone” to whatever timezone the site is in.
Create an Admin Account
- In the panel (menu) on the left, click on “Site adminstration”, then select the “Users” tab. Click the “Add a new user” link.
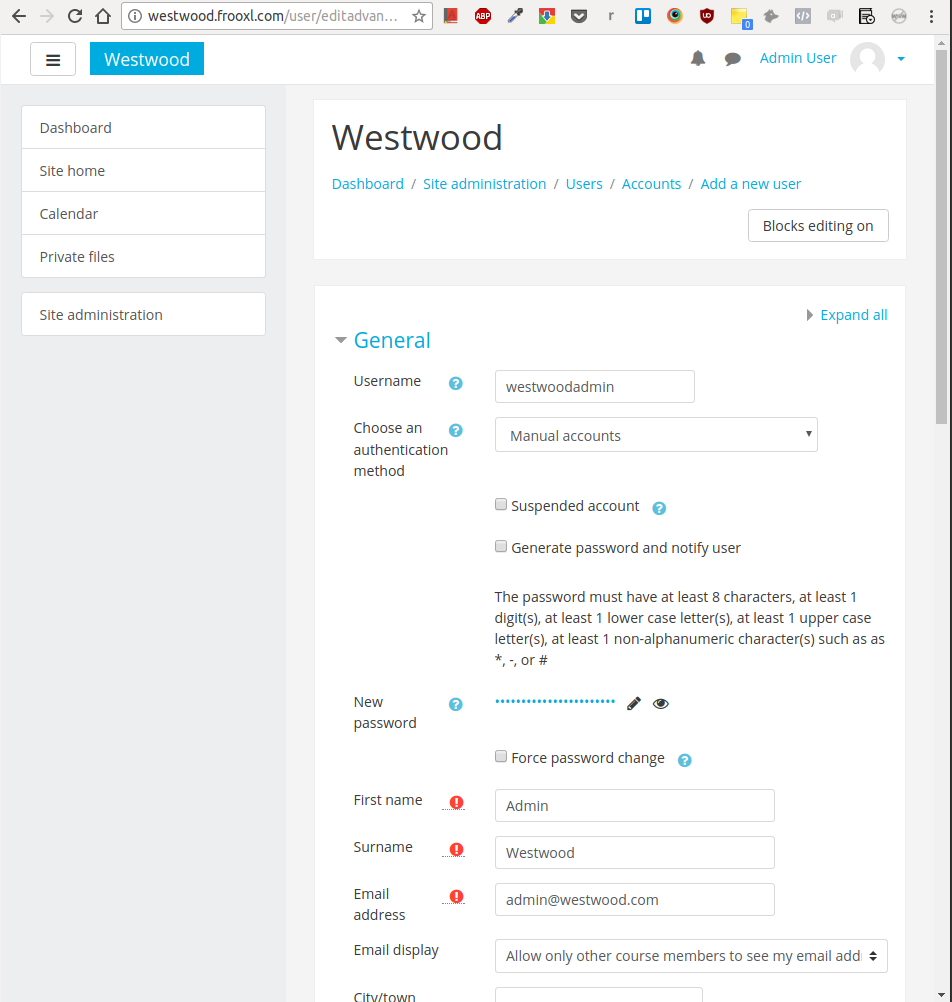
- Fill out the minimally required fields (see screenshot below):
- Username: your users’s company name, followed by ‘admin’. E.g.: westwoodadmin.
- Generate a strong, random password and store it securely (e.g. in KeePassX), together with the url and the username. Also fill in the password in the current Moodle form.
- Use ‘Admin’ as the first name and the company name as the last name (e.g. “Westwood”).
- If you’ve got a role based email address, use that, preferably the admin address – e.g. admin@westwood.com.
- Add the new customer’s account as a site administrator. Select “Site administration” > “Users” > “Site administrators” (see screenshot below):

- Select your users’s user and click “Add”:

- Afterwards, the form should look like this:
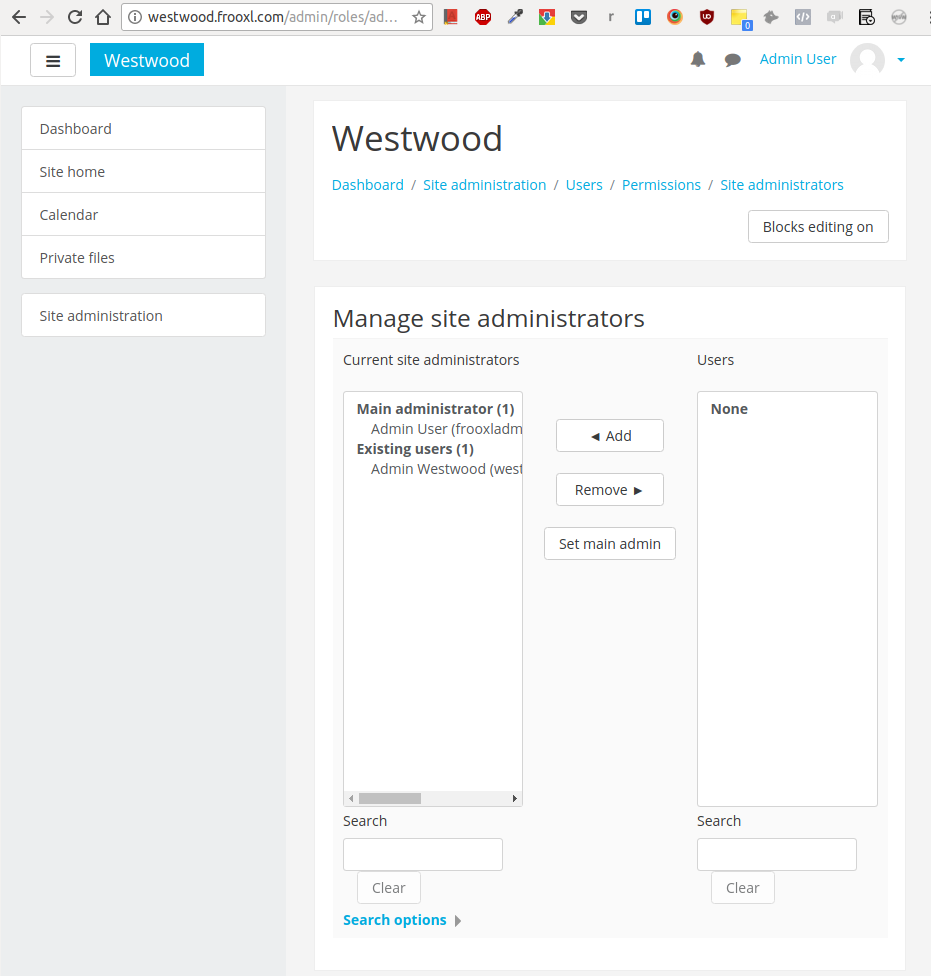
- (The customer’s account should appear under “Current site administrators”).
Add Outgoing Mail Configuration
Go to admin/settings.php?section=outgoingmailconfig and either:
- Add your users’s SMTP settings
- Or create a Mailgun account for your users (see Mailgun and Moodle Integration).
Change Upload Limits
By default, Moodle's upload limits are just one or two measly MBs. You need to change this upload limit to 1000 MB in a number of places:
- On the server: in the php.ini file, you need to set
post_max_sizeandupload_max_filesizeto 1000M (this is typically already done, you can check this under /admin/phpinfo.php – or Site administration > Server > PHP info) - Under Site security settings (Site administration > Site security settings), where you need to select 1000 MB for "Maximum uploaded file size".
- And finally for individual modules, by default at least the assignment module (mod assign), under /admin/settings.php?section=assignsubmission_file (go to Site administration > Plugins, select "File submissions"). This setting, again, needs to be 1000 MB.
Turn Off Update Notifications
Out of the box, Moodle will send out update notifications by email whenever a new version is available. This is alarming for some customers because they tend to think the software is outdated. Turn this feature off:
Site administration > Server > Update notifications
Disable the checkbox “Automatically check for available updates”.
Enable Apache X-Sendfile for large file delivery
Large Moodle sites usually serve videos, H5P files, SCORM packages, PDFs, and large images. By default these files are streamed through PHP-FPM, which reduces performance and limits concurrency. Enabling Apache’s X-Sendfile offloads file delivery to Apache, which is significantly faster.
Step 1: Install and enable mod_xsendfile
apt update
apt install libapache2-mod-xsendfile
a2enmod xsendfile
service apache2 restart
Step 2: Add X-Sendfile directives to the VirtualHost
Inside the VirtualHost configuration:
<IfModule mod_xsendfile.c>
    XSendFile on
    XSendFilePath /home/USERNAME/moodledata
    XSendFilePath /home/USERNAME/public_html
</IfModule>
Reload:
service apache2 reloadStep 3: Configure Moodle
Add this to config.php before the setup include:
$CFG->xsendfile = 'X-Sendfile';
$CFG->xsendfilealiases = array();- Default for standard Apache Moodle sites: use X-Sendfile and leave
$CFG->xsendfilealiases = []; - If logs or an X-Sendfile probe show aliased paths such as
/dataroot/..., add the required alias mapping for that site.
Step 4: Basic Apache test
Create:
xsendtest.php:
<?php
header("X-Sendfile: /home/USERNAME/moodledata/xsend-test.txt");
header("Content-Type: text/plain");
header('Content-Disposition: inline; filename="xsend-test.txt"');
exit;
Create the file:
echo "hello xsendfile" > /home/USERNAME/moodledata/xsend-test.txtTest:
curl -i https://domain/xsendtest.phpIf the file downloads correctly, Apache X-Sendfile works.
Aside: If you later observe slow requests
If the site suffers performance issues when users view large files, verify X-Sendfile is actually in use by running the Moodle-level probe described in the troubleshooting guide.
When X-Sendfile is active, PHP-FPM usage for large files drops dramatically and site responsiveness improves.
6. Create a Cron Job
On your users’s Moodle website, select: “Site administration” > “Site administration” (tab) > “Site policies”:
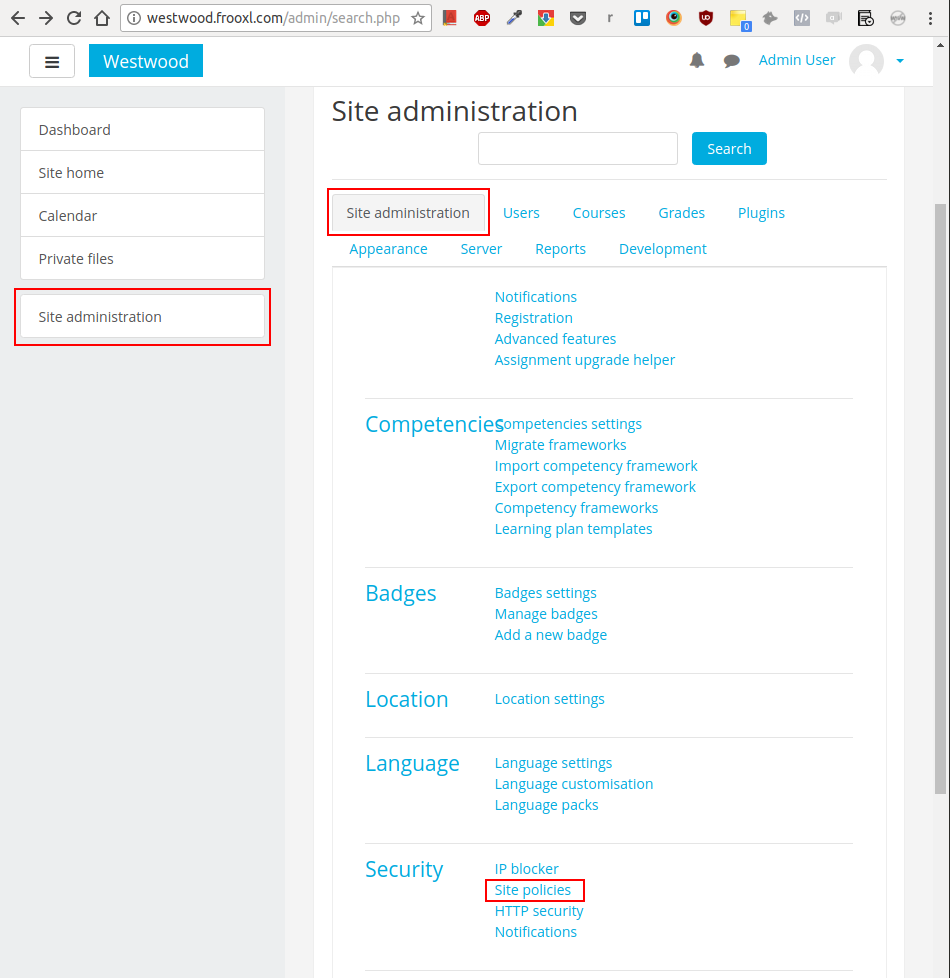
On the next page, scroll down and:
Leave “Cron execution via command line only” enabled. Run cron from the command line via a system cron job, not over the web. Web cron is disabled by default in modern Moodle because the URL can expose privileged information to anonymous users, and the Moodle developers have stated it is likely to be removed in a future version. CLI cron is the supported, secure approach.
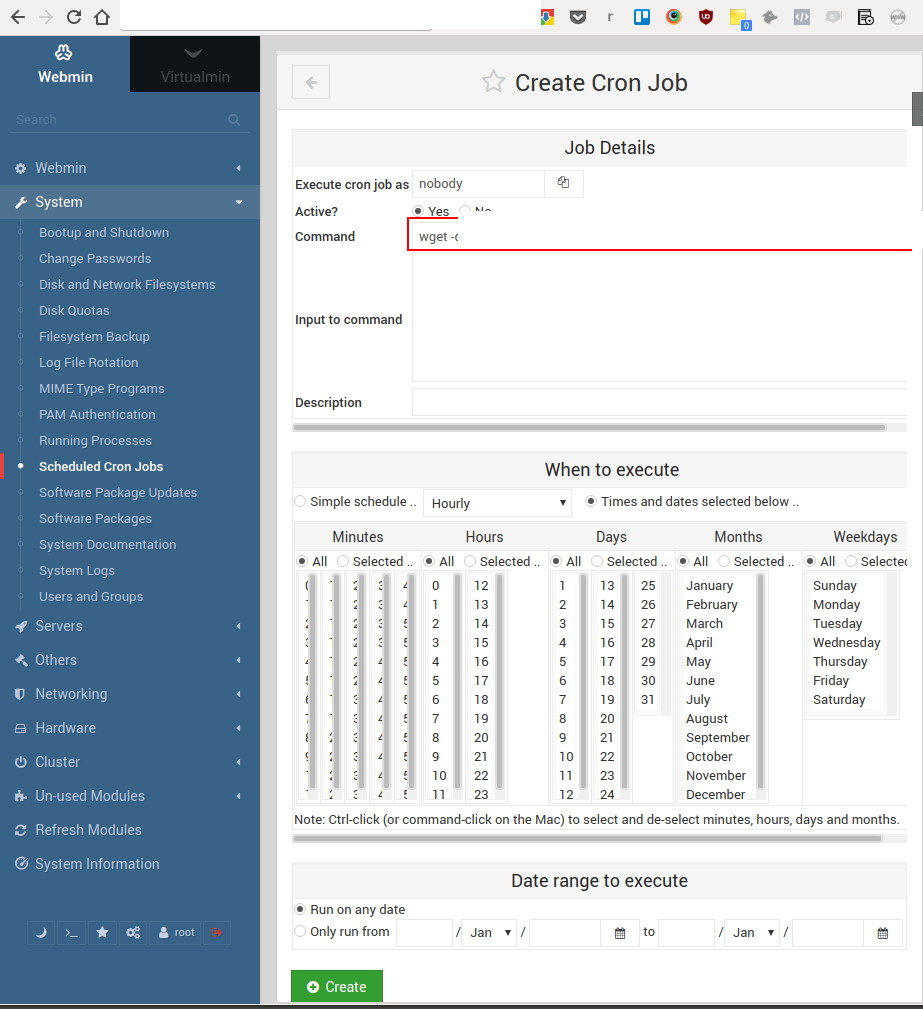
Add a system cron job that runs Moodle’s CLI cron every minute. In Webmin, go to “System” > “Scheduled Cron Jobs” and create a job (or edit crontab directly) with this command, adjusting the PHP binary path and Moodle path to match your server:
* * * * * /usr/bin/php /home/westwood/public_html/admin/cli/cron.php >/dev/nullRun the cron job as the web server user (or the vhost’s unix user) so file permissions match. Because CLI cron never touches the web, there is no remote cron password to set or protect.
7. Configure backupvhost.php Script for Backups
A simple solution for creating differential backups. Here is the script we are using:
https://bitbucket.org/exampleorg/serverbackupscripts/src/master/
This script is executed using a cron job started at different times for each vhost:
/usr/bin/php /home/backupvhost/scripts/backupvhost.php --config="/home/{unix user for vhost}/public_html/config.php" >/dev/nullThe script creates differential backups and sends the encrypted tar ball to:
backupuser@backup-host.example.com:/backups/{$hostname}_server_backups/{$CFG->dbname}/{$CFG->dbname}.backup_day{$backupday}.tar.gz.gpgOn each server, there is a user backupvhost who has an ssh key pair. The public key is stored on the backup (destination) server to enable authentication without the need of specifying a password (there is no passphrase).
Please note: there will always be one additional full backup to make sure the incremental parts from the previous period can also be restored.
Installation of Backup Script on Server
To get the backup script working on a new server, follow the steps below (see the Git repo for the most recent version of these instructions). If you already have the backup script installed on the server, skip to the next section.
- Create a 'backupvhost' unix user on the web server.
- Add the 'backupvhost' user to the user group of the vhost's unix user (add vhost unix user to backupvhost’s secondary group in Webmin)
- Generate a public / private ssh key pair for the backupvhost user.
- Add the public key to the git repo for the backup script.
- Install this script in a 'scripts' folder in the home directory of the backupvhost user using git
- Create a backup directory in the home directory of the backupvhost user. You should have the following files and folders now:
/home/backupvhost/scripts/backupvhost.php/home/backupvhost/backup/- Add the public key of the backupvhost user to the destination server.
- Initiate a very small scp copy to the destination server and answer yes on the following question:The authenticity of host 'backup-host.example.com (203.0.113.10)' can't be established. ED25519 key fingerprint is SHA256:xxxxxxxxxxxxxxxxxxxxxxxxxxxxxxxxxxxxxxxxxxx. This key is not known by any other names Are you sure you want to continue connecting (yes/no/[fingerprint])?
- Add a folder
{source hostname}_server_backupson the destination server. - On the source server, grant the right permissions to the script:
chmod 770 scripts/backupvhost.phpchown backupvhost scripts/backupvhost.php- Create a folder
/backups/{source hostname}_server_backups/{databasename}/on the destination server for each vhost that you want to backup. - Test the script manually. Remove the results afterwards from the destination server. Calling the script should look something like this:
/usr/bin/php /home/backupvhost/scripts/backupvhost.php --config="/home/{unix user for vhost}/public_html/config.php" --hostname="{source hostname}" >/dev/null- Run this script as user 'backupvhost', typically as a daily cron job (choose a time around midnight, but pay attention to other backups jobs so as not to tax the system too much at any given time).
- Check the backup results the following day on the destination server.
Creating a Cron Job to Call the Backup Script for a New Moodle Installation
To get the backup script working for a new Moodle installation, follow these steps:
- Create a folder
/backups/{source hostname}_server_backups/{databasename}/on the destination (backup) server for the vhost that you want to backup. (source hostnameis typically your server’s name). - Add vhost unix user to backupvhost’s secondary group in Webmin.
- Do the same for www-data and set the correct permissions e.g.:
usermod -a -G www-data backupvhostchmod -R g+rX /home/example-db/moodledata - Test the script manually (through a screen session). Remove the results from the destination server afterwards. Calling the script should look something like this:
su backupvhost;/usr/bin/php /home/backupvhost/scripts/backupvhost.php --config="/home/{unix user for vhost}/public_html/config.php" --hostname="{source hostname}" >/dev/null- Run this script as user 'backupvhost', typically as a daily cron job (choose a time around midnight, but pay attention to other backups jobs so as not to tax the system too much at the same time).
- Check the backup results the following day on the destination server.
Previously: Install a database backup script [Out of Date]
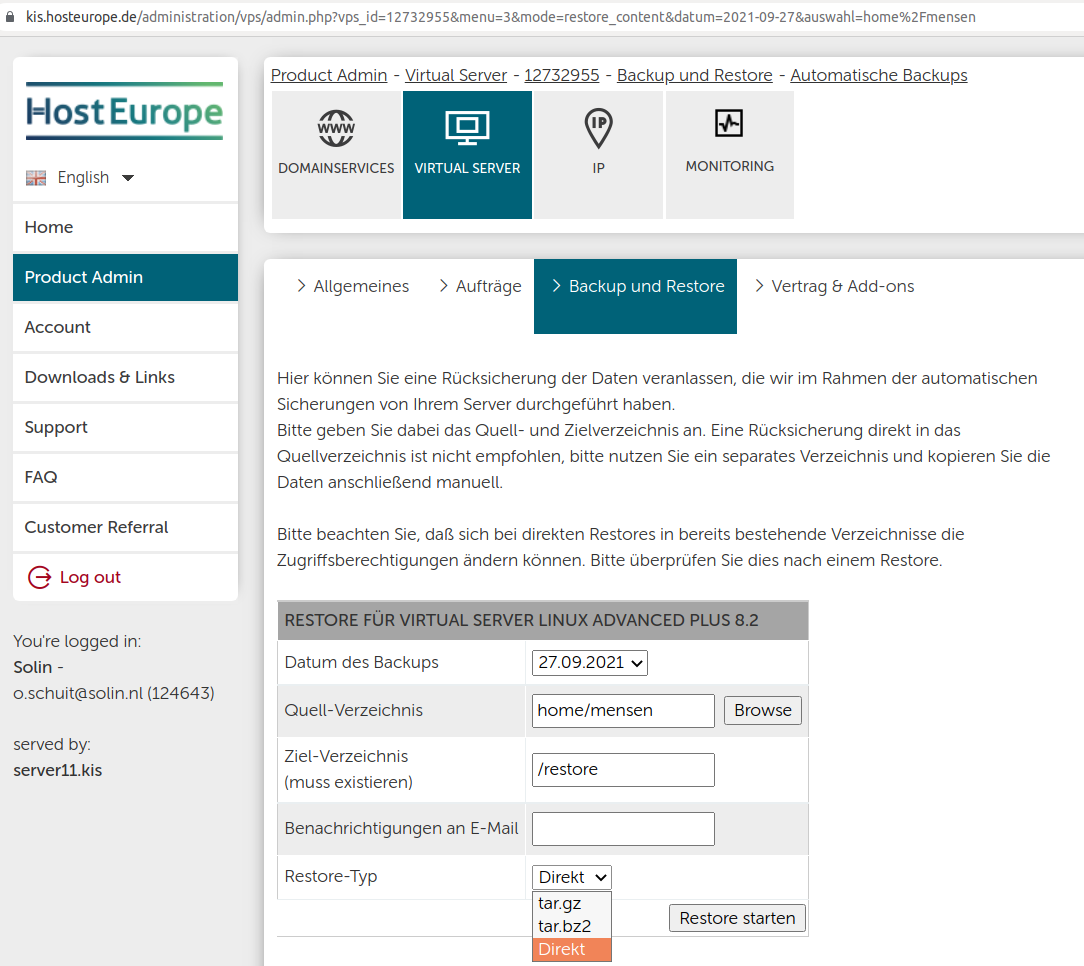
Our data center (Hosting Provider) used to create daily backups of the entire file system, for a window of fourteen days. They don’t do that anymore, but here is how we used the daily backups in the past.
The daily backups also include the binary database files. But these can be hard to restore on another system. Therefore, we install a Bash script that creates a database dump and compresses it in one go. Here’s an example script:
#!/bin/bash
## location: /home/example-db/db-backup/example-db-backup.sh
mysqldump --single-transaction -uexample-db -p[secret_password] example-db | gzip -c > /home/example-db/db-backup/example-db.sql.gz
This script creates a zipped database dump which will be included in the data center’s daily backup. Together with the public_html and the moodledata directories, this file can be used to completely restore a working Moodle installation on another system, should the need arise.
Steps to get the Bash script working
- Create a
db-backupdirectory in the home directory. - Use vim or another text editor to create the [customer]-backup.sh script inside the db-backup directory.
- Set the owner to your users:
chown -R [customer]:[customer] /home/[customer]/db-backup - Set the permissions to 770:
chmod -R 770 db-backup - Give the database user (example-db in this example above) the proper permissions to user mysqldump: PROCESS (‘Manage processes’ in Webmin)
- Check that the script is actually working properly: su (change user) to [customer] then run the script manually and check the contents of the zip file.
- If you run into a disk quota issue: set the quota to unlimited for both the user and the group.
- Create a cron job to execute the script on a daily basis, e.g. one hour before midnight (at that moment the data center starts their own backups). Use Webmin to create the cron job, but you can also use crontab:
@daily /home/[customer]/db-backup/[customer]-backup.sh #Creates a daily backup of the [customer] database (as a gz file)- The next day, check that the script has run properly (the timestamp should be shortly before midnight).
Here’s the Bash script without a specific customer’s name:
#!/bin/bash
## location: /home/[customer]/db-backup/[customer]-backup.sh
mysqldump --single-transaction -u[customer] -p[secret_password] [customer] | gzip -c > /home/[customer]/db-backup/[customer].sql.gz
8. Add Monitoring
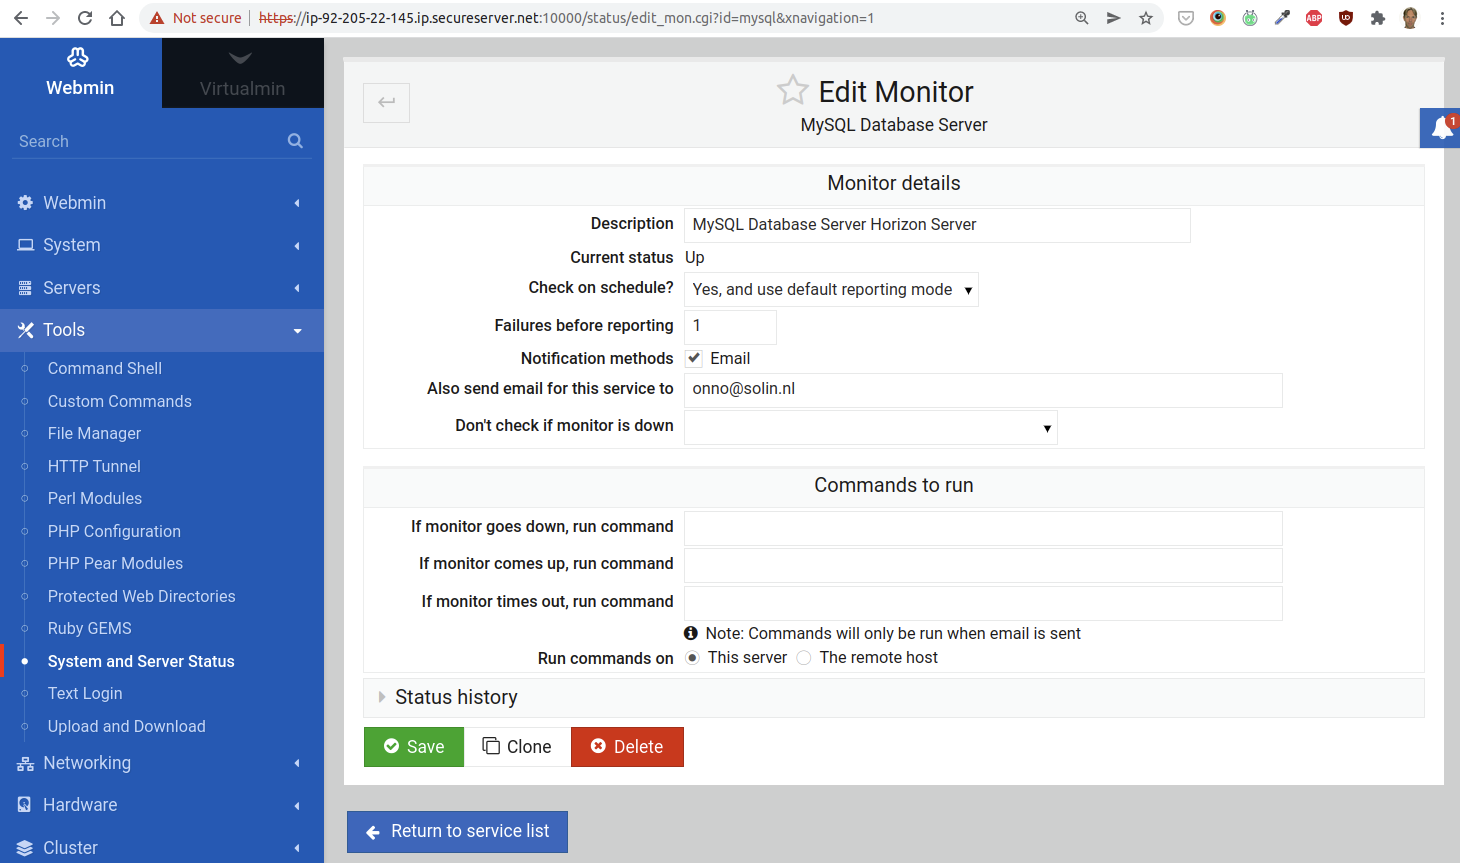
To check that the website is up at all times, we add a “Remote HTTP Service” monitor to a Webmin installation. This should be done on another web server than the one hosting the current Moodle site.
Go to Tools > System and Server Status and click on the button Add monitor of type, while HTTP Request is selected. This should take you to the following screen:
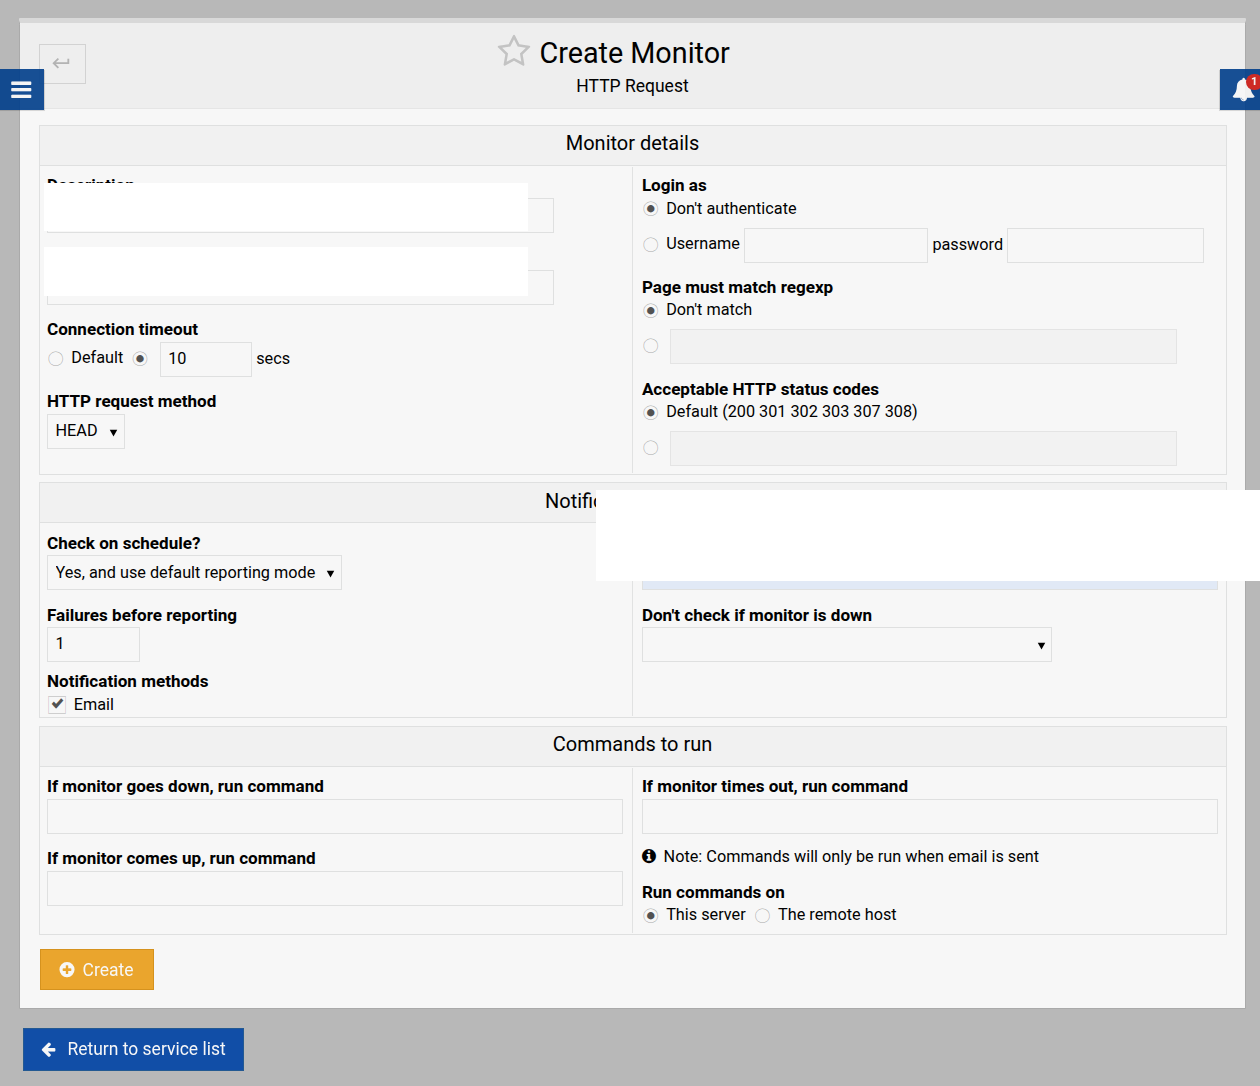
Set the field “Connection timeout” to 10 seconds. This should also notify you if the loading times for the Moodle website get unacceptable (i.e. more than 10 seconds).
9. Share Access Credentials
If the Moodle installation is completely ready, and no further content editing is required, notify your users directly. In your email, include:
- Url for the new Moodle installation
- Username
- Password
At any rate, send the company’s Moodle admin account (username and password) for this installation to the lead developer (the lead engineer, at the time of writing), including MySQL's password, the Unix password and the url. Be sure to do that in a secure way.
Solin specializes in Moodle hosting and VPS configuration.
Contact us