Large Moodle clones can consume enormous amounts of disk space and time. This guide identifies which tables and directories can safely be skipped for development or testing, and shows how to recreate missing tables afterward. If the goal is moving a live site rather than copying it, see moving Moodle to a new server and domain.
What to Skip When Cloning Large Sites
Some customers have very large Moodle installations, with literally hundreds of Gigabytes worth of data. In that case, you can skip:
The moodledata directory (you won’t be able to see any uploaded files such as scorms, videos or pictures though)
The mdl_files table when creating a database dump, as well as
the mdl_logstore_standard_log table
Recreating the Omitted Tables
If you’ve got a database dump without the mdl_files and mdl_logstore_standard_log tables, you need to recreate them in your own copy of the database. Use these SQL statements to do so:
CREATE TABLE `mdl_files` (
  `id` bigint(10) NOT NULL,
  `contenthash` varchar(40) COLLATE utf8mb4_unicode_ci NOT NULL DEFAULT '',
  `pathnamehash` varchar(40) COLLATE utf8mb4_unicode_ci NOT NULL DEFAULT '',
  `contextid` bigint(10) NOT NULL,
  `component` varchar(100) COLLATE utf8mb4_unicode_ci NOT NULL DEFAULT '',
  `filearea` varchar(50) COLLATE utf8mb4_unicode_ci NOT NULL DEFAULT '',
  `itemid` bigint(10) NOT NULL,
  `filepath` varchar(255) COLLATE utf8mb4_unicode_ci NOT NULL DEFAULT '',
  `filename` varchar(255) COLLATE utf8mb4_unicode_ci NOT NULL DEFAULT '',
  `userid` bigint(10) DEFAULT NULL,
  `filesize` bigint(10) NOT NULL,
  `mimetype` varchar(100) COLLATE utf8mb4_unicode_ci DEFAULT NULL,
  `status` bigint(10) NOT NULL DEFAULT '0',
  `source` longtext COLLATE utf8mb4_unicode_ci,
  `author` varchar(255) COLLATE utf8mb4_unicode_ci DEFAULT NULL,
  `license` varchar(255) COLLATE utf8mb4_unicode_ci DEFAULT NULL,
  `timecreated` bigint(10) NOT NULL,
  `timemodified` bigint(10) NOT NULL,
  `sortorder` bigint(10) NOT NULL DEFAULT '0',
  `referencefileid` bigint(10) DEFAULT NULL
) ENGINE=InnoDB DEFAULT CHARSET=utf8mb4 COLLATE=utf8mb4_unicode_ci COMMENT='description of files, content is stored in sha1 file pool' ROW_FORMAT=COMPRESSED;

--
-- Indexes for dumped tables
--

--
-- Indexes for table `mdl_files`
--
ALTER TABLE `mdl_files`
  ADD PRIMARY KEY (`id`),
  ADD UNIQUE KEY `mdl_file_pat_uix` (`pathnamehash`),
  ADD KEY `mdl_file_comfilconite_ix` (`component`,`filearea`,`contextid`,`itemid`),
  ADD KEY `mdl_file_con_ix` (`contenthash`),
  ADD KEY `mdl_file_lic_ix` (`license`),
  ADD KEY `mdl_file_con2_ix` (`contextid`),
  ADD KEY `mdl_file_use_ix` (`userid`),
  ADD KEY `mdl_file_ref_ix` (`referencefileid`);

--
-- AUTO_INCREMENT for dumped tables
--

--
-- AUTO_INCREMENT for table `mdl_files`
--
ALTER TABLE `mdl_files`
  MODIFY `id` bigint(10) NOT NULL AUTO_INCREMENT;


CREATE TABLE `mdl_logstore_standard_log` (
  `id` bigint(10) NOT NULL,
  `eventname` varchar(255) COLLATE utf8mb4_unicode_ci NOT NULL DEFAULT '',
  `component` varchar(100) COLLATE utf8mb4_unicode_ci NOT NULL DEFAULT '',
  `action` varchar(100) COLLATE utf8mb4_unicode_ci NOT NULL DEFAULT '',
  `target` varchar(100) COLLATE utf8mb4_unicode_ci NOT NULL DEFAULT '',
  `objecttable` varchar(50) COLLATE utf8mb4_unicode_ci DEFAULT NULL,
  `objectid` bigint(10) DEFAULT NULL,
  `crud` varchar(1) COLLATE utf8mb4_unicode_ci NOT NULL DEFAULT '',
  `edulevel` tinyint(1) NOT NULL,
  `contextid` bigint(10) NOT NULL,
  `contextlevel` bigint(10) NOT NULL,
  `contextinstanceid` bigint(10) NOT NULL,
  `userid` bigint(10) NOT NULL,
  `courseid` bigint(10) DEFAULT NULL,
  `relateduserid` bigint(10) DEFAULT NULL,
  `anonymous` tinyint(1) NOT NULL DEFAULT '0',
  `other` longtext COLLATE utf8mb4_unicode_ci,
  `timecreated` bigint(10) NOT NULL,
  `origin` varchar(10) COLLATE utf8mb4_unicode_ci DEFAULT NULL,
  `ip` varchar(45) COLLATE utf8mb4_unicode_ci DEFAULT NULL,
  `realuserid` bigint(10) DEFAULT NULL
) ENGINE=InnoDB DEFAULT CHARSET=utf8mb4 COLLATE=utf8mb4_unicode_ci COMMENT='Standard log table' ROW_FORMAT=COMPRESSED;

--
-- Indexes for dumped tables
--

--
-- Indexes for table `mdl_logstore_standard_log`
--
ALTER TABLE `mdl_logstore_standard_log`
  ADD PRIMARY KEY (`id`),
  ADD KEY `mdl_logsstanlog_tim_ix` (`timecreated`),
  ADD KEY `mdl_logsstanlog_couanotim_ix` (`courseid`,`anonymous`,`timecreated`),
  ADD KEY `mdl_logsstanlog_useconconcr_ix` (`userid`,`contextlevel`,`contextinstanceid`,`crud`,`edulevel`,`timecreated`),
  ADD KEY `mdl_logsstanlog_con_ix` (`contextid`);

--
-- AUTO_INCREMENT for dumped tables
--

--
-- AUTO_INCREMENT for table `mdl_logstore_standard_log`
--
ALTER TABLE `mdl_logstore_standard_log`
  MODIFY `id` bigint(10) NOT NULL AUTO_INCREMENT;
Setting up a new Moodle instance on a VPS requires careful configuration of DNS, virtual hosts, and web server settings. This guide covers the complete workflow from domain setup through initial Moodle installation.
1. Create a DNS record
There are two options here (described in more detail below):
The customer has access to their own DNS server or provides you with access data: link their preferred (sub)domain to the ip address of your VPS server.
Create a DNS Record for a Subdomain under Our Domain: this means that you have to adjust the DNS settings for one of your own domains, to link a subdomain to the VPS.
Link the Customer’s Preferred (sub)domain to the IP Address of your VPS Server
If your users already has a (sub)domain name for their new Moodle installation, you have to go into their own DNS server and create the necessary changes. Since there’s no telling what DNS server or provider they’re using, the exact steps vary by DNS provider.
The outcome should usually be an A record that links their (sub)domain to the ip address of your server:
lms.westwood.com. IN A 123.456.789.101
In short: their (sub)domain should be link to our ip address.
Create a DNS Record for a Subdomain under Our Domain
2. Create a VirtualHost
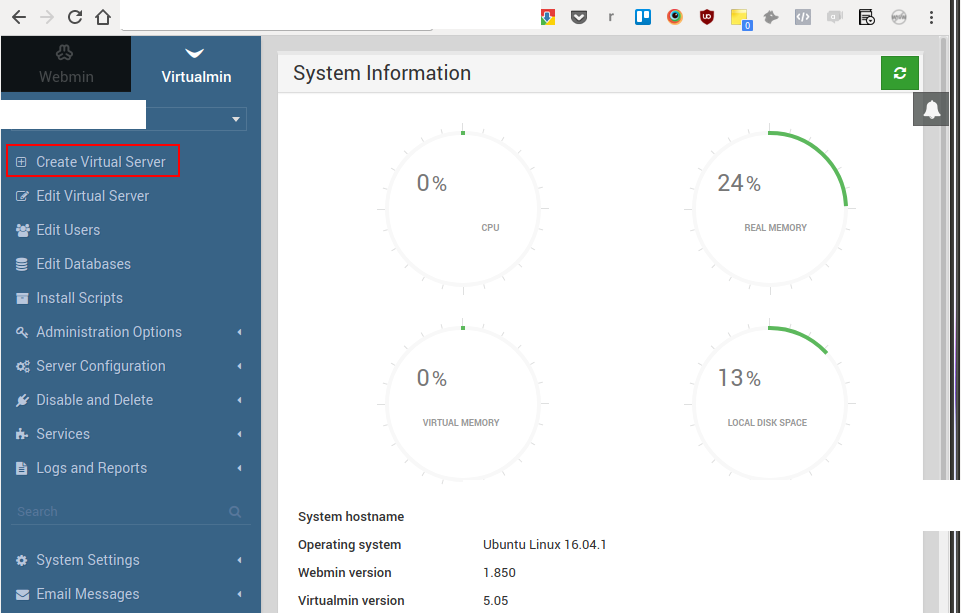
Log in to Virtualmin on the your-vps server: https://198.51.100.42:10000/?virtualmin.
Then select “Create Virtual Server”:
Input the details for the new virtualhost:
Please note:
Use the subdomain as the Administration username (use the “Custom username” feature). E.g. if the domain is westwood.example-lms.com, then ‘westwood’ becomes the Administration username.
Create a strong, random password and store it in a very secure password wallet (e.g. KeePassX).
If you use Virtualmin, be sure to adapt the quota (usually 1GB by default) – otherwise larger Moodle installations will run into the limit. (MySQL server will even crash entirely if you try to import data beyond the quota limit. I once had to manually delete the database directory from /var/lib/mysql/ to get it working again, because the MySQL server wouldn’t even start in recovery mode.) To double check whether a quota limit applies:
root@yourserver:~# quota -u example-db
Disk quotas for user example-db (uid 1020): none
If the database creation fails for some reason, simply use: create database mydatabasename character set utf8mb4 collate utf8mb4_unicode_ci;
3. Set the Database Password
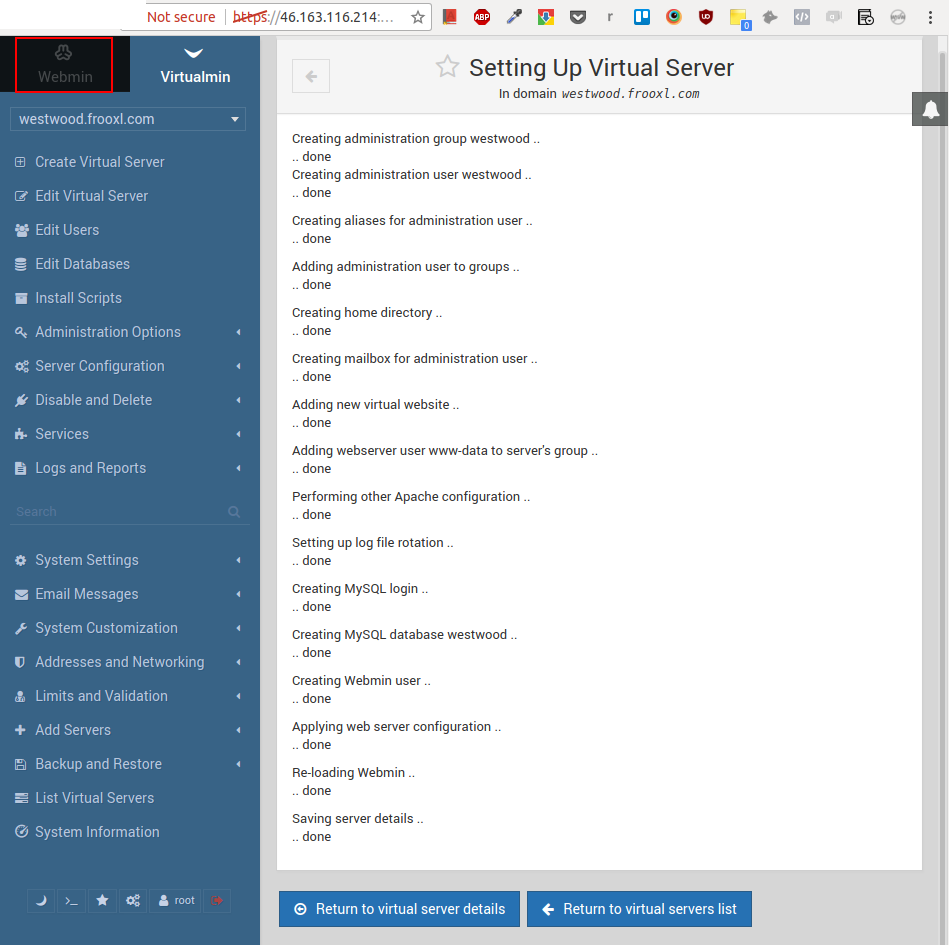
After completing the previous step, click “Create Server” (see previous screenshot).
If the virtual server has been set up, click on “Webmin” in the top left corner of the window:
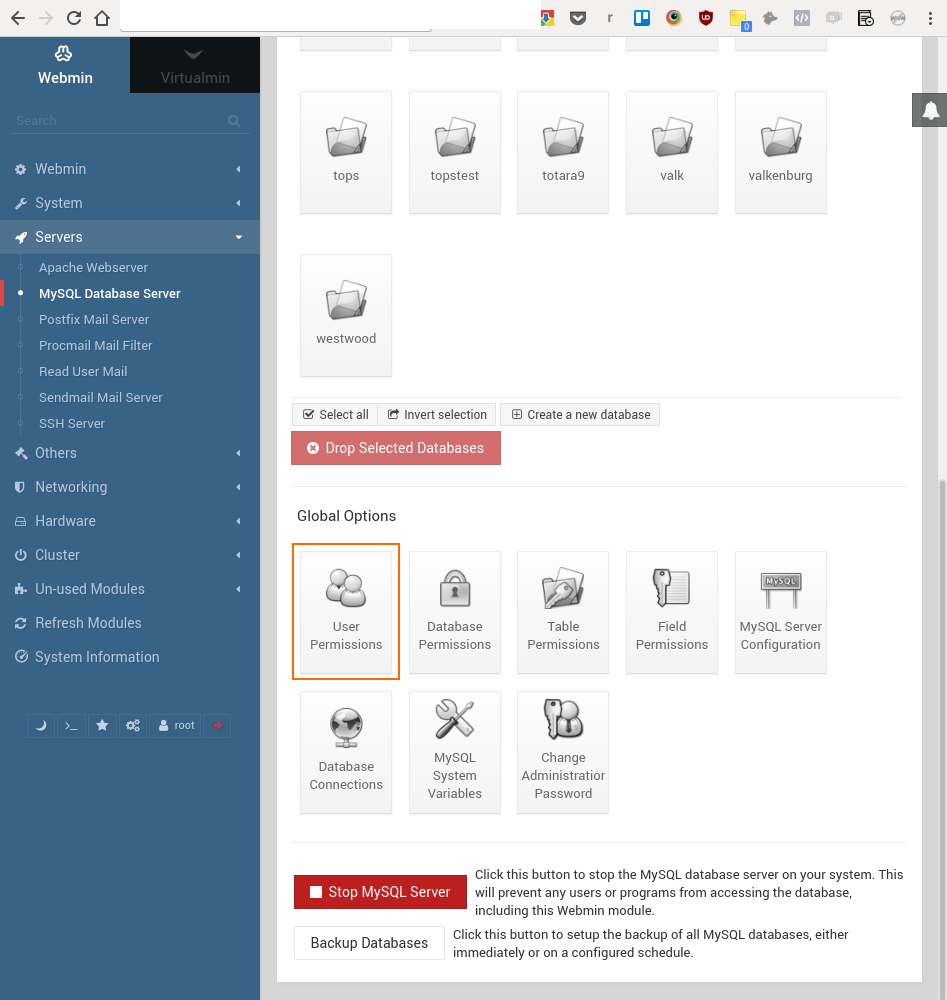
In the blue panel on the left, select “Servers” > “MySQL Database Server. Then scroll down and click “User Permissions” (Under “Global Options”)::
Then click on the database user with the name of the new subdomain (i.e. the Administration username), Westwood in this example:
Now type in a strong, random password and store that password in your password wallet (e.g. KeePassX):
Click “Save” to complete this step.
Solving Database Connection Errors
If you run into any database connection problems, they may be due to using a recent MySQL version and an older Moodle version. Here are the known issues we have run into:
Authentication issue when using ‘traditional’ native MySQL native password
Using Moodle 2.x with MySQL 8
Authentication Issue
Add default-authentication-plugin=mysql_native_password to the [mysqld] section of /etc/mysql/mysql.conf.d.
Change the authentication method for the database user:
ALTER USER example-db@localhost IDENTIFIED WITH mysql_native_password BY 'thepassword';
Using Moodle 2.x with MySQL 8
If you are using a very old Moodle version, such as 2.x, together with a newer version of MySQL, e.g. version 8, then you will need to make some changes to the source code. You will also need to address the authentication mentioned above.
Change the code in lib/dml/mysqli_native_moodle_database.php, line 523:
$sql = "SELECT column_name as `column_name`, data_type as `data_type`, character_maximum_length as `character_maximum_length`, numeric_precision as `numeric_precision`, numeric_scale as `numeric_scale`, is_nullable as `is_nullable`, column_type as `column_type`, column_default as `column_default`, column_key as `column_key`, extra as `extra`
 FROM information_schema.columns
To summarize: add aliases for every single column name.
It may also be necessary to make an additional change if you get the error message Unknown system variable 'storage_engine'.
Fix this issue by editing lib/dml/mysqli_native_moodle_database.php. Replace:
@@storage_engine
with
@@default_storage_engine
(In two places, in this case.)
There will still be a notice:
Notice: Undefined index: engine in /home/example-client/public_html/lib/dml/mysqli_native_moodle_database.php on line 173
But that will be ignored if you turn off full debugging mode.
For Totara: Grant Permissions to Create Tables & Indexes
If you’re installing Totara, please make sure the database user has adequate permissions to create caching tables and indexes. (For the report builder.)
Using The MySQL Client To Create Database And DB User
Instead of using Webmin, you can also use the commandline tool mysql:
mysql -u root -p
CREATE DATABASE moodle_db DEFAULT CHARACTER SET utf8mb4 COLLATE utf8mb4_unicode_ci;
CREATE USER 'moodle_user'@'localhost' IDENTIFIED BY 'your_strong_password';
GRANT ALL PRIVILEGES ON moodle_db.* TO 'moodle_user'@'localhost';
FLUSH PRIVILEGES;
4. Create a Git Repository
Before we install or deploy the code for the new Moodle website, we need to set up a Git repository. In this guide this guide uses Bitbucket to store the remote repository, but any other system is fine too (e.g. Gitlab or Github).
New Bitbucket Repository
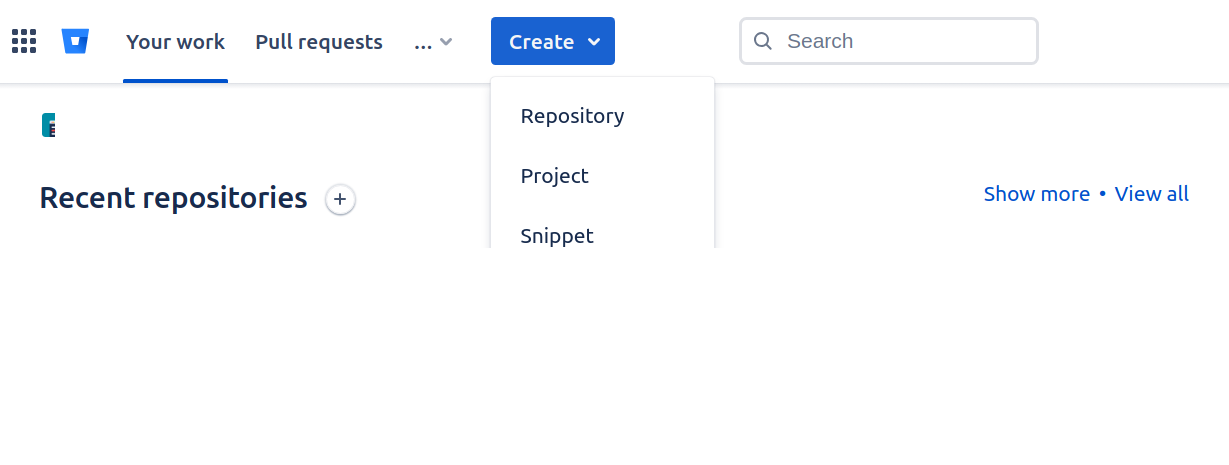
On Bitbucket.com, use the ‘Create’ button to add a new repository:
Bitbucket will also ask you to create a Project. Lately, I’ve made it a habit to use your users’s name for the project, and your users’s name for their platform (Moodle or Totara) as the name for the repository.
Clone Repo and Get the Moodle Code
On your local machine, clone the repo. Then add the Moodle repo as the upstream repo:
Get a specific branch. Here, we pull the current LTS branch (check the upstream repo for the latest stable branch name; at the time of writing the LTS is Moodle 4.5, so the branch is MOODLE_405_STABLE):
git pull upstream MOODLE_405_STABLE
Create a local branch based on the upstream branch:
Then copy all the files from moodle41 to the current branch:
git checkout moodle41 .
Yes, this looks like we’re switching to another branch altogether, but notice the dot. This apparently means: get the files from branch moodle41 and put them in the currently checked out branch (which is the master branch in this example).
After you’re done, commit and push the changes to remote.
Please note that we can’t add the Totara source code in this way because Totara is not really open source: there is no publicly available Git repository for it.
Caveat: 3rd Party Plugins
Please note: the method described above also works if you allow users to install their plugins (through the standard Moodle interface). But you wouldn’t have the complete code base in your git repo of course.
However, this still needs to be executed on your local machine since it requires a commit afterwards. From the link above:
$ cd /path/to/your/moodle
$ git submodule foreach git pull
The command git submodule foreach [another command] walks through all submodule repositiories and executes what is specified by [another command]. In this case it is git pull. Therefore, the module mylittleextension was updated and the main repository isn't clean anymore until changes are committed:
$ git commit -a -m "Plugin updates"
Since the git users on the live servers do not have write access to the repository, we can’t do the above on the live server itself. (We don’t want to give them write access because their private ssh keys are on the web server, accessible for everyone on that server).
Add Public Key of Vhost’s Unix User to Bitbucket
We are going to use Git to deploy the new code (and also later, e.g. for minor and major Moodle upgrades). Login on the web server and:
su to the unix user for the website
Execute the following command: ssh-keygen
Skip the passphrase – we don’t want to use a passphrase (but only in this case)
Put the public key in Bitbucket repo through “Repository settings > Access keys”
Provide a clear label, e.g. “mbcc user on your-vps”
Clone the repository: ‘git clone’. Make sure the directory containing the git repository is the webroot (usually called public_html or htdocs)
Set the permissions, e.g.: chmod -R 755 public_html
Secure the .git folder by doing a chmod -R 700 .git (we’ve had complaints from security officers that the .git folder was public, even though what’s in it is typically public anyway since it’s open source software).
5. Install & Configure Moodle
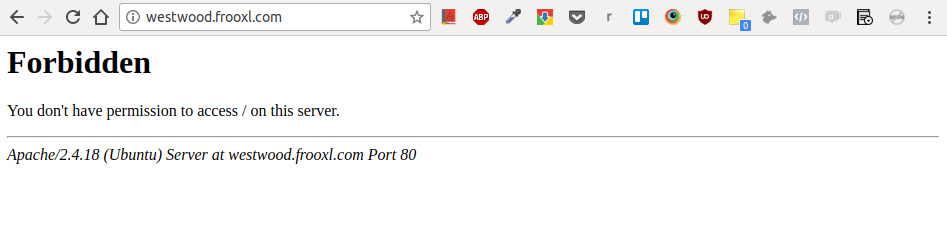
Make sure the (sub)domain can be reached, e.g.:
You will get an error message ‘Forbidden’, but that’s okay since there’s no actual website yet. If something went wrong, you’ll see a different message, e.g.: “This site can’t be reached”.
Login to the VPS, e.g.:
engineer@opsbox-computer14:~$ ssh sysadmin@198.51.100.42
Welcome to Ubuntu 16.04.3 LTS (GNU/Linux 4.4.0-042stab123.9 x86_64)

 * Documentation:  https://help.ubuntu.com
 * Management:     https://landscape.canonical.com
 * Support:        https://ubuntu.com/advantage
Last login: Sun Aug 27 08:34:07 2017 from 83.162.44.210
sysadmin@yourserver:~$
Move to your users’s home directory:
sysadmin@yourserver:~$ cd /home/westwood
sysadmin@yourserver:/home/westwood$
If you have deployed the code through Git, which is the preferred way, you can skip ahead to step 11: Make a copy of public_html/config-dist.php. Otherwise, go to https://download.moodle.org/releases/latest/ and click on the download button for the package that is built weekly:
(Cancel the download to your local machine.) Copy the download link:
Edit the contents of public_html/config.php with your text editor, e.g. vim:
$CFG->dbtype    = 'mysqli';      // 'pgsql', 'mariadb', 'mysqli', 'mssql', 'sqlsrv' or
$CFG->dblibrary = 'native';     // 'native' only at the moment
$CFG->dbhost    = 'localhost';  // eg 'localhost' or 'db.isp.com' or IP
$CFG->dbname    = 'westwood';     // database name, eg moodle
$CFG->dbuser    = 'westwood';   // your database username
$CFG->dbpass    = 'the_secret_password';   // your database password
$CFG->prefix    = 'mdl_';       // prefix to use for all table names
$CFG->dboptions = array(
    'dbpersist' => false,       // should persistent database connections be
    'dbsocket'  => false,       // should connection via UNIX socket be used?
    'dbport'    => '',          // the TCP port number to use when connecting
    'dbhandlesoptions' => false,// On PostgreSQL poolers like pgbouncer don't
    'dbcollation' => 'utf8mb4_unicode_ci', // MySQL has partial and full UTF-8
);
$CFG->wwwroot   = 'http://westwood.example-lms.com';
$CFG->dataroot  = '/home/westwood/moodledata';
The lines that need changing are highlighted. This is an excerpt from a config.php file, not a complete config.php file.. Do not replace the code of your config.php file with this code, but make the changes in the file itself (new code may have been added by the Moodle core team).
Secure the Moodle Installation
Make sure the directories have the right permissions and ownership (for the username, we’re following the ‘westwood’ example – change this to match the client’s username):
sudo chown -R westwood:www-data public_html
sudo chmod -R 0755 public_html
sudo chown -R westwood:www-data moodledata
sudo chmod -R 0750 moodledata
Also consider closing public access to the .git folder if it’s in your webroot. Even though most of the code is open source, some clients are still paranoid about it.
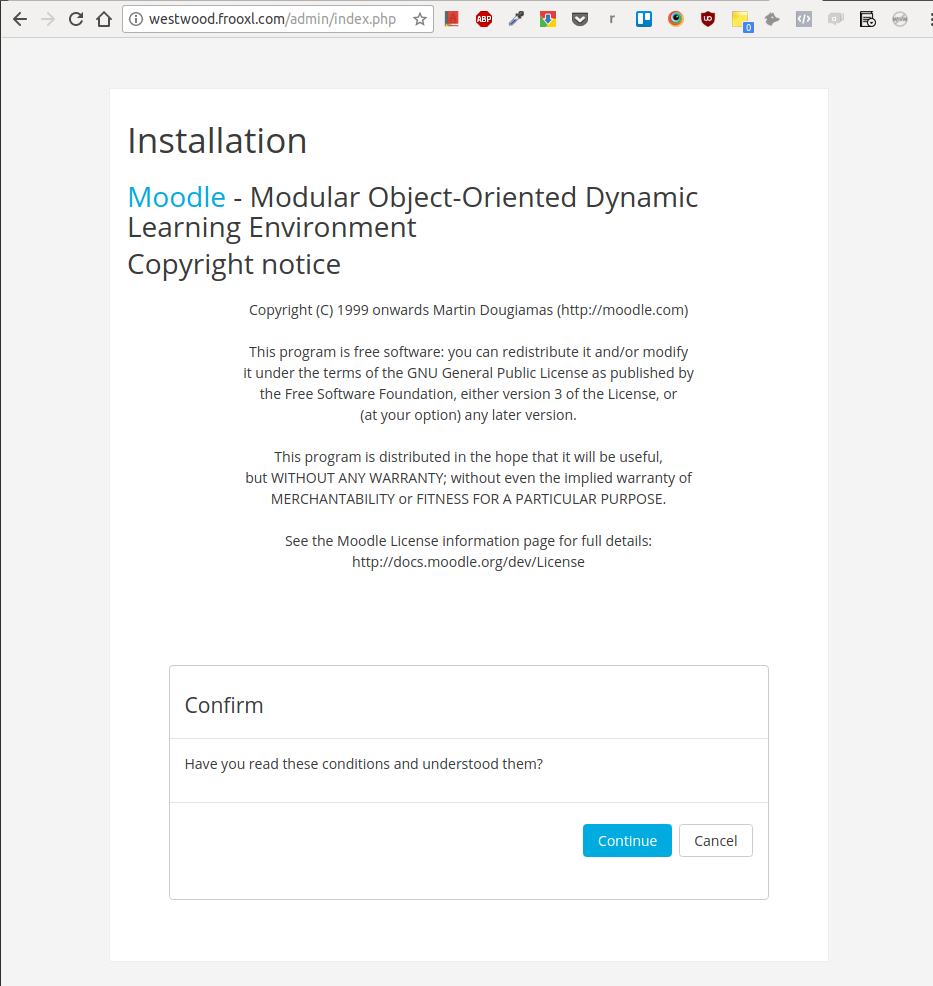
Go to the website to actually install Moodle. It should redirect you to /admin/index.php:
Just follow the installation wizard from here on (ignore any notifications about https).
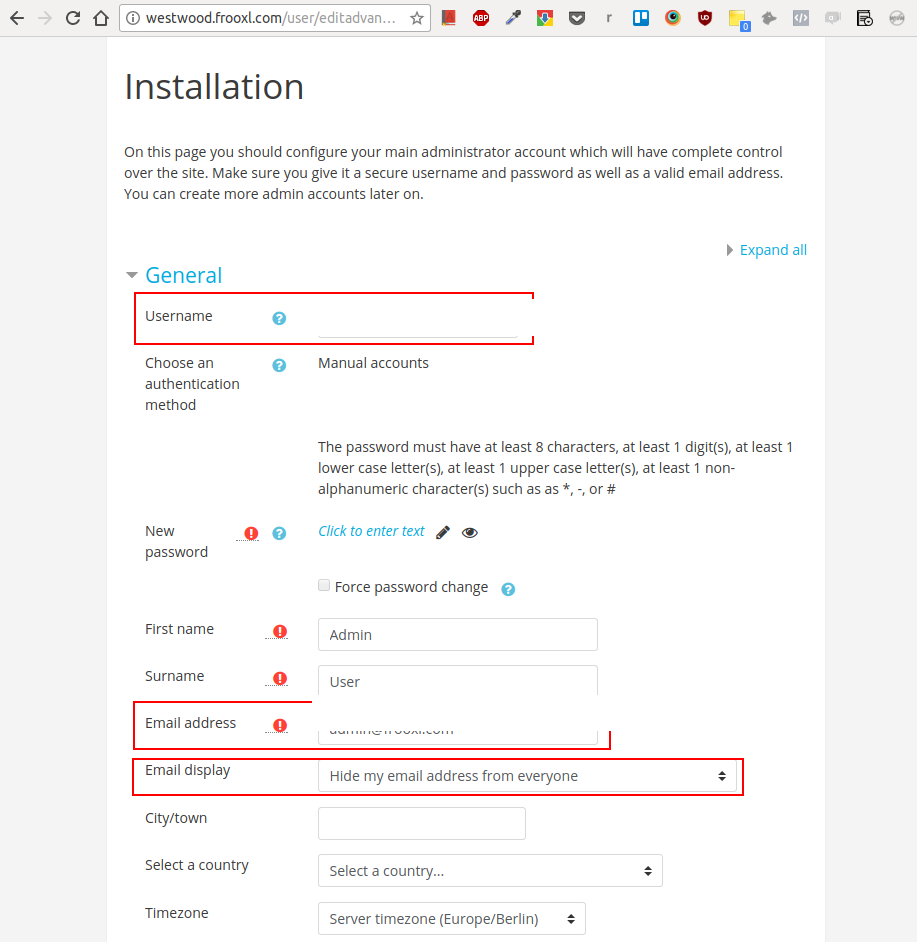
In the installation form (see screenshot below):
The username should be either siteadmin, yoursiteadmin or example-siteadmin (again, whatever is appropriate).
Use admin@example-lms.com, admin@your-domain.com or admin@example.com as the admin’s email address (whatever is appropriate, e.g. if the site is Frooxl’s then it should be admin@example-lms.com).
Set Email display to “Hide my email address from everyone”.
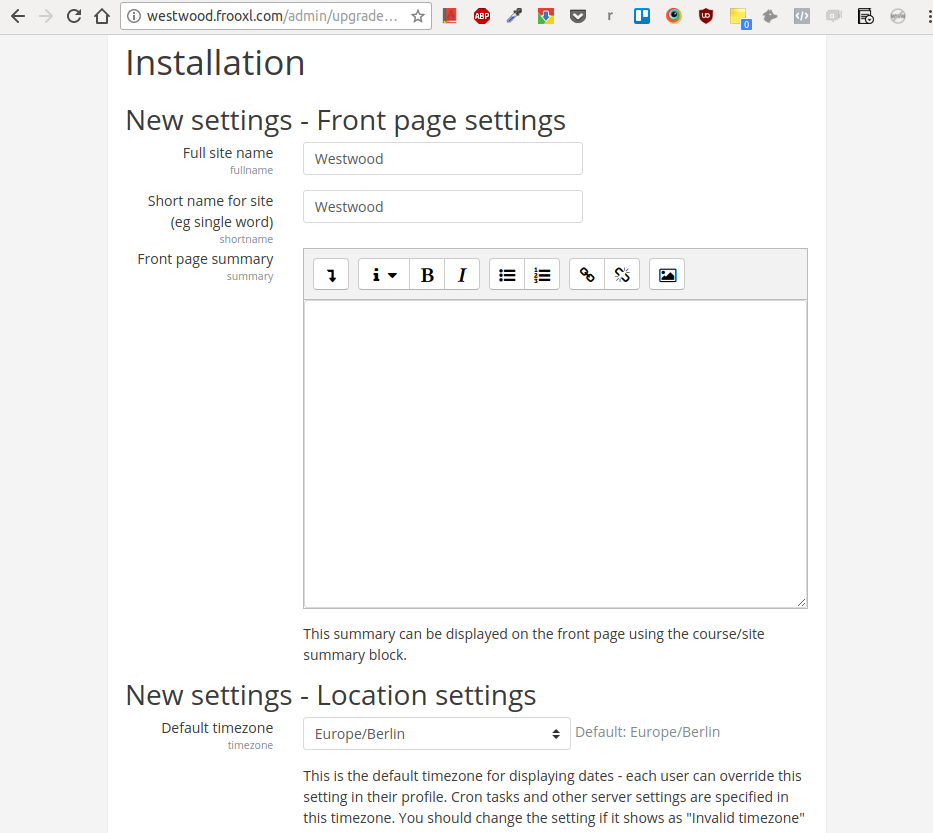
For the Front page settings, use the subdomain name (or your users’s chosen name for the LMS) as the “Full site name” and the “Short name for site”. Set the “Default timezone” to whatever timezone the site is in.
Create an Admin Account
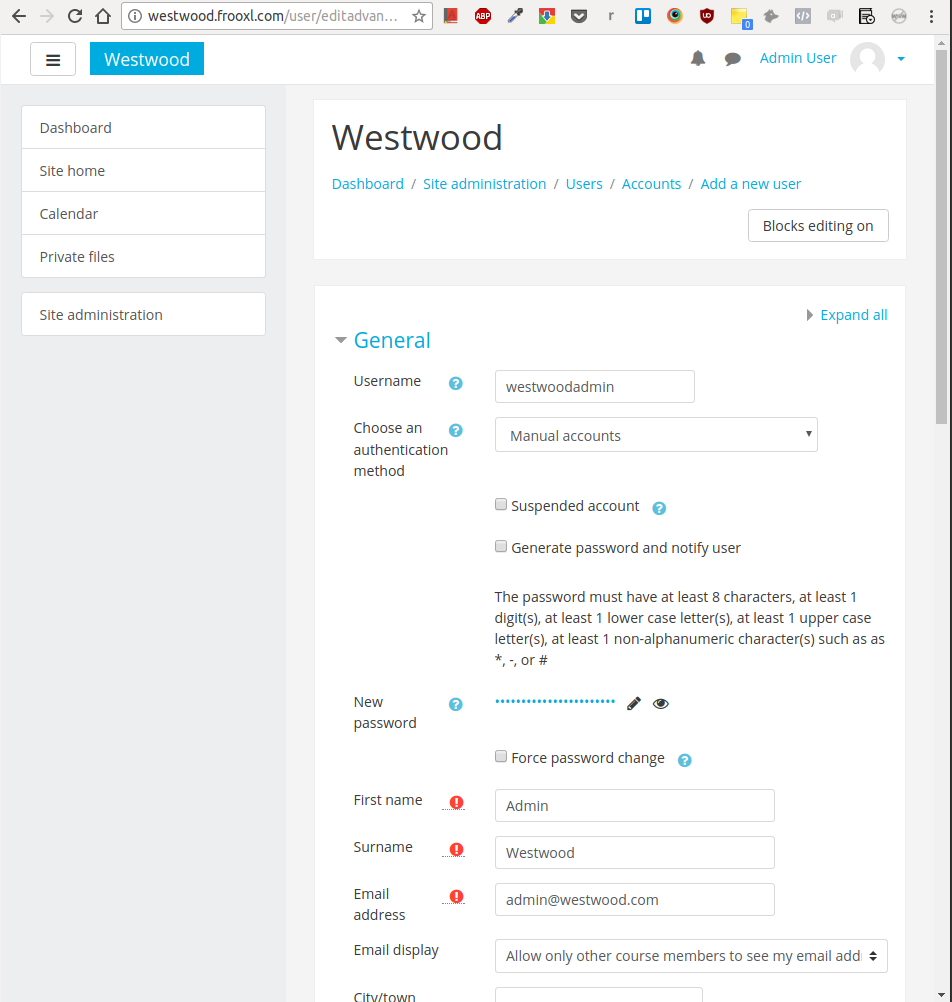
In the panel (menu) on the left, click on “Site adminstration”, then select the “Users” tab. Click the “Add a new user” link.
Fill out the minimally required fields (see screenshot below):
Username: your users’s company name, followed by ‘admin’. E.g.: westwoodadmin.
Generate a strong, random password and store it securely (e.g. in KeePassX), together with the url and the username. Also fill in the password in the current Moodle form.
Use ‘Admin’ as the first name and the company name as the last name (e.g. “Westwood”).
If you’ve got a role based email address, use that, preferably the admin address – e.g. admin@westwood.com.
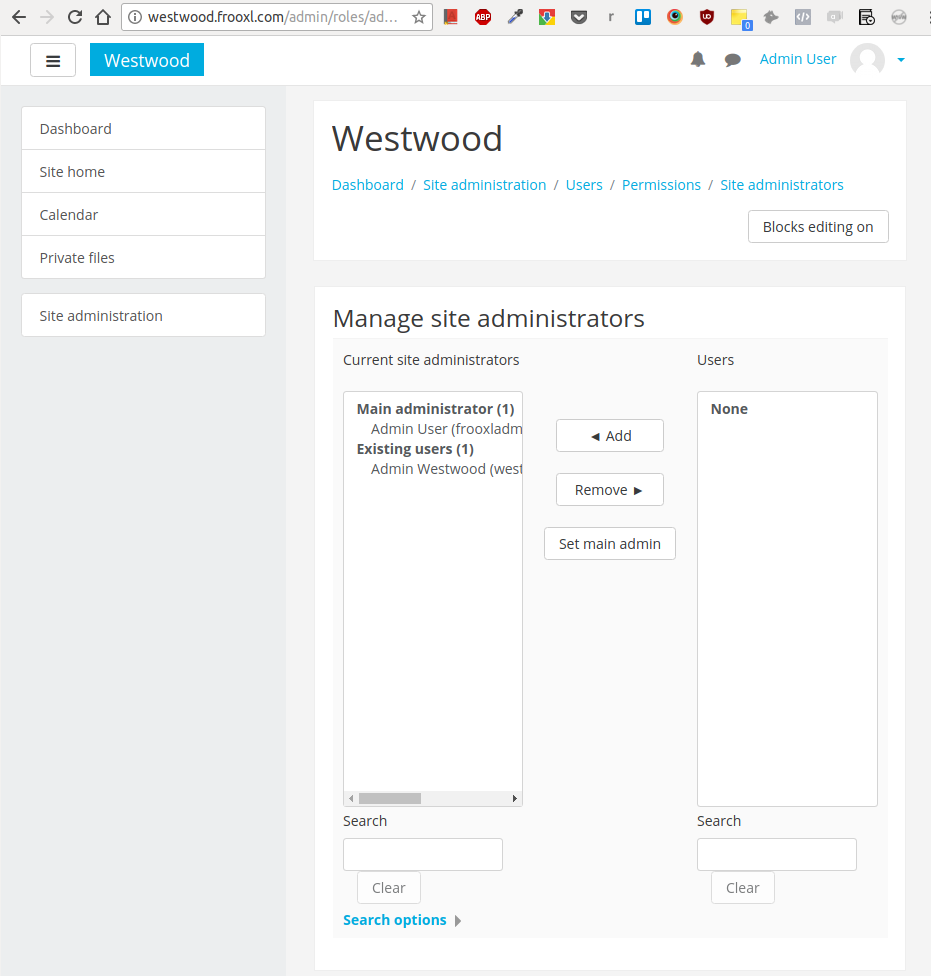
Add the new customer’s account as a site administrator. Select “Site administration” > “Users” > “Site administrators” (see screenshot below):
Select your users’s user and click “Add”:
Afterwards, the form should look like this:
(The customer’s account should appear under “Current site administrators”).
Add Outgoing Mail Configuration
Go to admin/settings.php?section=outgoingmailconfig and either:
Add your users’s SMTP settings
Or create a Mailgun account for your users (see Mailgun and Moodle Integration).
Change Upload Limits
By default, Moodle's upload limits are just one or two measly MBs. You need to change this upload limit to 1000 MB in a number of places:
On the server: in the php.ini file, you need to set post_max_size and upload_max_filesize to 1000M (this is typically already done, you can check this under /admin/phpinfo.php – or Site administration > Server > PHP info)
Under Site security settings (Site administration > Site security settings), where you need to select 1000 MB for "Maximum uploaded file size".
And finally for individual modules, by default at least the assignment module (mod assign), under /admin/settings.php?section=assignsubmission_file (go to Site administration > Plugins, select "File submissions"). This setting, again, needs to be 1000 MB.
Turn Off Update Notifications
Out of the box, Moodle will send out update notifications by email whenever a new version is available. This is alarming for some customers because they tend to think the software is outdated. Turn this feature off:
Site administration > Server > Update notifications
Disable the checkbox “Automatically check for available updates”.
Enable Apache X-Sendfile for large file delivery
Large Moodle sites usually serve videos, H5P files, SCORM packages, PDFs, and large images. By default these files are streamed through PHP-FPM, which reduces performance and limits concurrency. Enabling Apache’s X-Sendfile offloads file delivery to Apache, which is significantly faster.
Step 1: Install and enable mod_xsendfile
apt update
apt install libapache2-mod-xsendfile
a2enmod xsendfile
service apache2 restart
Step 2: Add X-Sendfile directives to the VirtualHost
Inside the VirtualHost configuration:
<IfModule mod_xsendfile.c>
    XSendFile on
    XSendFilePath /home/USERNAME/moodledata
    XSendFilePath /home/USERNAME/public_html
</IfModule>
If the file downloads correctly, Apache X-Sendfile works.
Aside: If you later observe slow requests
If the site suffers performance issues when users view large files, verify X-Sendfile is actually in use by running the Moodle-level probe described in the troubleshooting guide.
When X-Sendfile is active, PHP-FPM usage for large files drops dramatically and site responsiveness improves.
6. Create a Cron Job
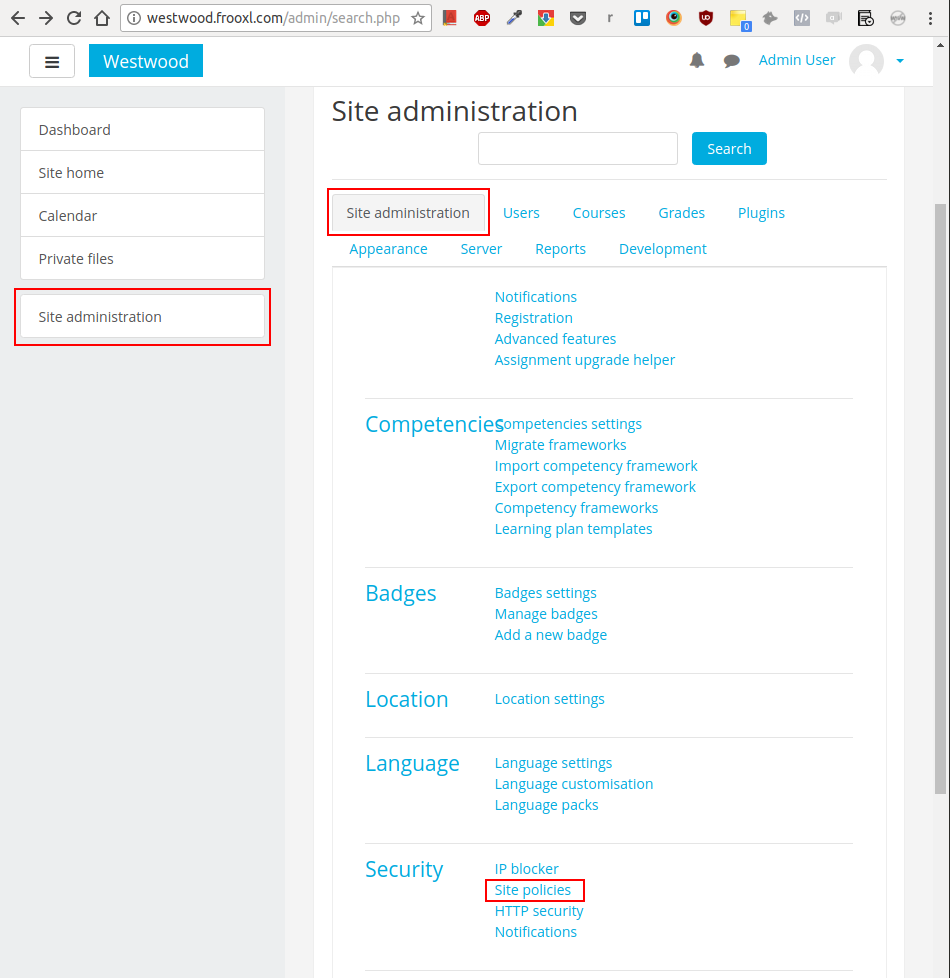
On your users’s Moodle website, select: “Site administration” > “Site administration” (tab) > “Site policies”:
On the next page, scroll down and:
Leave “Cron execution via command line only” enabled. Run cron from the command line via a system cron job, not over the web. Web cron is disabled by default in modern Moodle because the URL can expose privileged information to anonymous users, and the Moodle developers have stated it is likely to be removed in a future version. CLI cron is the supported, secure approach.
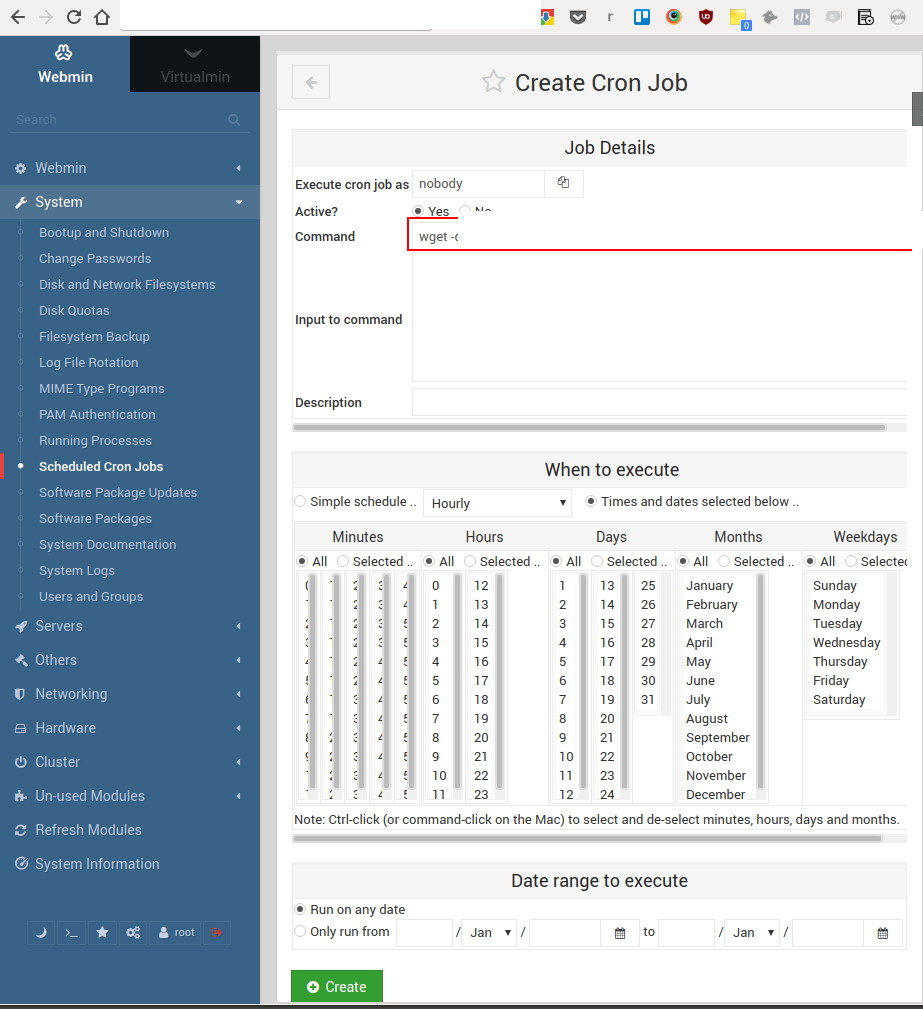
Add a system cron job that runs Moodle’s CLI cron every minute. In Webmin, go to “System” > “Scheduled Cron Jobs” and create a job (or edit crontab directly) with this command, adjusting the PHP binary path and Moodle path to match your server:
Run the cron job as the web server user (or the vhost’s unix user) so file permissions match. Because CLI cron never touches the web, there is no remote cron password to set or protect.
7. Configure backupvhost.php Script for Backups
A simple solution for creating differential backups. Here is the script we are using:
On each server, there is a user backupvhost who has an ssh key pair. The public key is stored on the backup (destination) server to enable authentication without the need of specifying a password (there is no passphrase).
Please note: there will always be one additional full backup to make sure the incremental parts from the previous period can also be restored.
Installation of Backup Script on Server
To get the backup script working on a new server, follow the steps below (see the Git repo for the most recent version of these instructions). If you already have the backup script installed on the server, skip to the next section.
Create a 'backupvhost' unix user on the web server.
Add the 'backupvhost' user to the user group of the vhost's unix user (add vhost unix user to backupvhost’s secondary group in Webmin)
Generate a public / private ssh key pair for the backupvhost user.
Add the public key to the git repo for the backup script.
Install this script in a 'scripts' folder in the home directory of the backupvhost user using git
Create a backup directory in the home directory of the backupvhost user. You should have the following files and folders now:
Add the public key of the backupvhost user to the destination server.
Initiate a very small scp copy to the destination server and answer yes on the following question:The authenticity of host 'backup-host.example.com (203.0.113.10)' can't be established. ED25519 key fingerprint is SHA256:xxxxxxxxxxxxxxxxxxxxxxxxxxxxxxxxxxxxxxxxxxx. This key is not known by any other names Are you sure you want to continue connecting (yes/no/[fingerprint])?
Add a folder {source hostname}_server_backups on the destination server.
On the source server, grant the right permissions to the script:
chmod 770 scripts/backupvhost.php
chown backupvhost scripts/backupvhost.php
Create a folder/backups/{source hostname}_server_backups/{databasename}/ on the destination server for each vhost that you want to backup.
Test the script manually. Remove the results afterwards from the destination server. Calling the script should look something like this:
/usr/bin/php /home/backupvhost/scripts/backupvhost.php --config="/home/{unix user for vhost}/public_html/config.php" --hostname="{source hostname}" >/dev/null
Run this script as user 'backupvhost', typically as a daily cron job (choose a time around midnight, but pay attention to other backups jobs so as not to tax the system too much at any given time).
Check the backup results the following day on the destination server.
Creating a Cron Job to Call the Backup Script for a New Moodle Installation
To get the backup script working for a new Moodle installation, follow these steps:
Create a folder/backups/{source hostname}_server_backups/{databasename}/ on the destination (backup) server for the vhost that you want to backup. (source hostname is typically your server’s name).
Add vhost unix user to backupvhost’s secondary group in Webmin.
Do the same for www-data and set the correct permissions e.g.:usermod -a -G www-data backupvhostchmod -R g+rX /home/example-db/moodledata
Test the script manually (through a screen session). Remove the results from the destination server afterwards. Calling the script should look something like this:
su backupvhost;
/usr/bin/php /home/backupvhost/scripts/backupvhost.php --config="/home/{unix user for vhost}/public_html/config.php" --hostname="{source hostname}" >/dev/null
Run this script as user 'backupvhost', typically as a daily cron job (choose a time around midnight, but pay attention to other backups jobs so as not to tax the system too much at the same time).
Check the backup results the following day on the destination server.
Previously: Install a database backup script [Out of Date]
Our data center (Hosting Provider) used to create daily backups of the entire file system, for a window of fourteen days. They don’t do that anymore, but here is how we used the daily backups in the past.
The daily backups also include the binary database files. But these can be hard to restore on another system. Therefore, we install a Bash script that creates a database dump and compresses it in one go. Here’s an example script:
This script creates a zipped database dump which will be included in the data center’s daily backup. Together with the public_html and the moodledata directories, this file can be used to completely restore a working Moodle installation on another system, should the need arise.
Steps to get the Bash script working
Create a db-backup directory in the home directory.
Use vim or another text editor to create the [customer]-backup.sh script inside the db-backup directory.
Set the owner to your users: chown -R [customer]:[customer] /home/[customer]/db-backup
Set the permissions to 770: chmod -R 770 db-backup
Give the database user (example-db in this example above) the proper permissions to user mysqldump: PROCESS (‘Manage processes’ in Webmin)
Check that the script is actually working properly: su (change user) to [customer] then run the script manually and check the contents of the zip file.
If you run into a disk quota issue: set the quota to unlimited for both the user and the group.
Create a cron job to execute the script on a daily basis, e.g. one hour before midnight (at that moment the data center starts their own backups). Use Webmin to create the cron job, but you can also use crontab:
@daily /home/[customer]/db-backup/[customer]-backup.sh #Creates a daily backup of the [customer] database (as a gz file)
The next day, check that the script has run properly (the timestamp should be shortly before midnight).
Here’s the Bash script without a specific customer’s name:
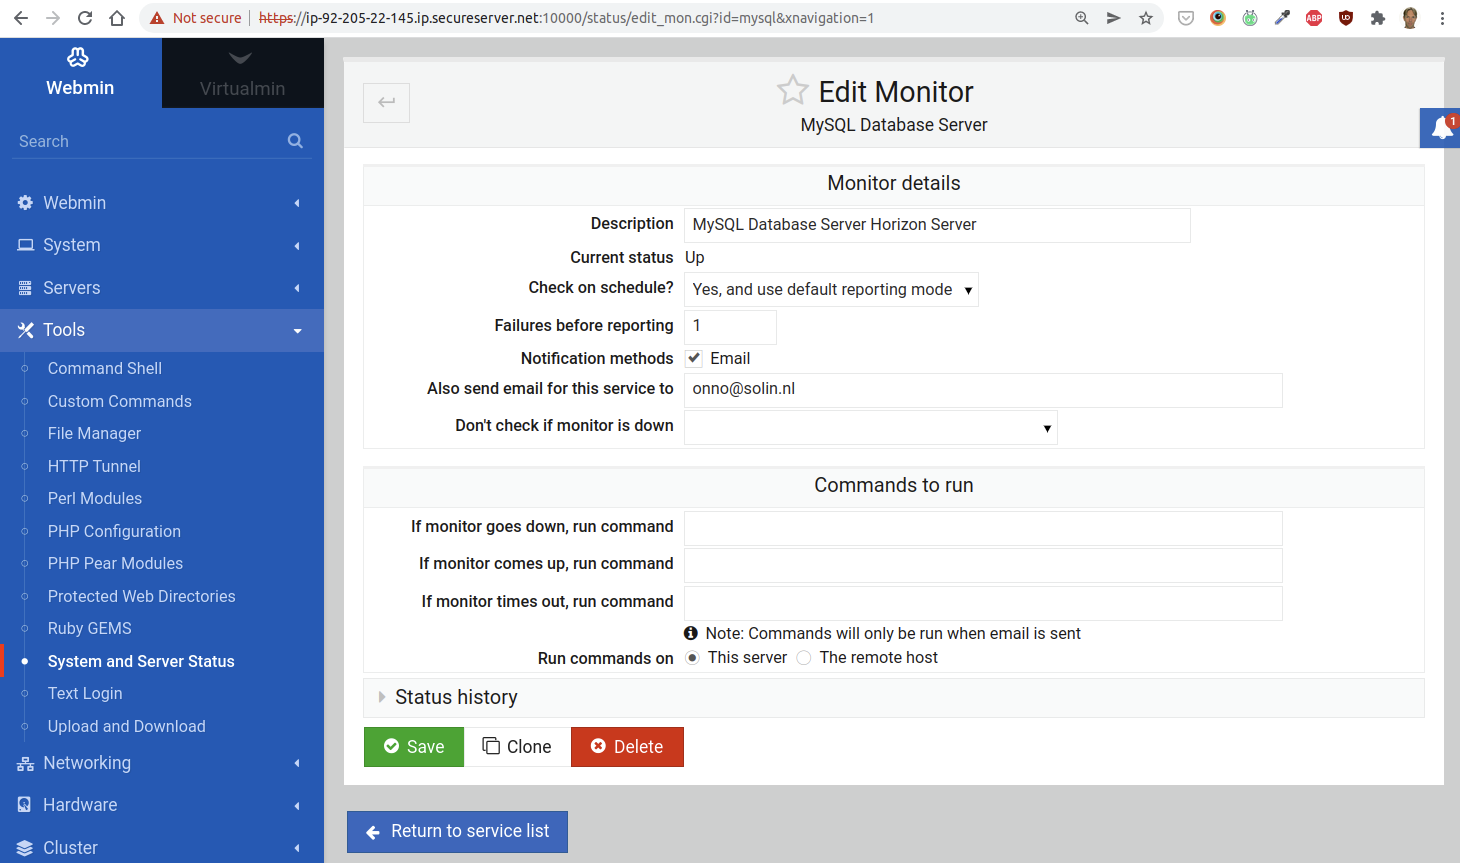
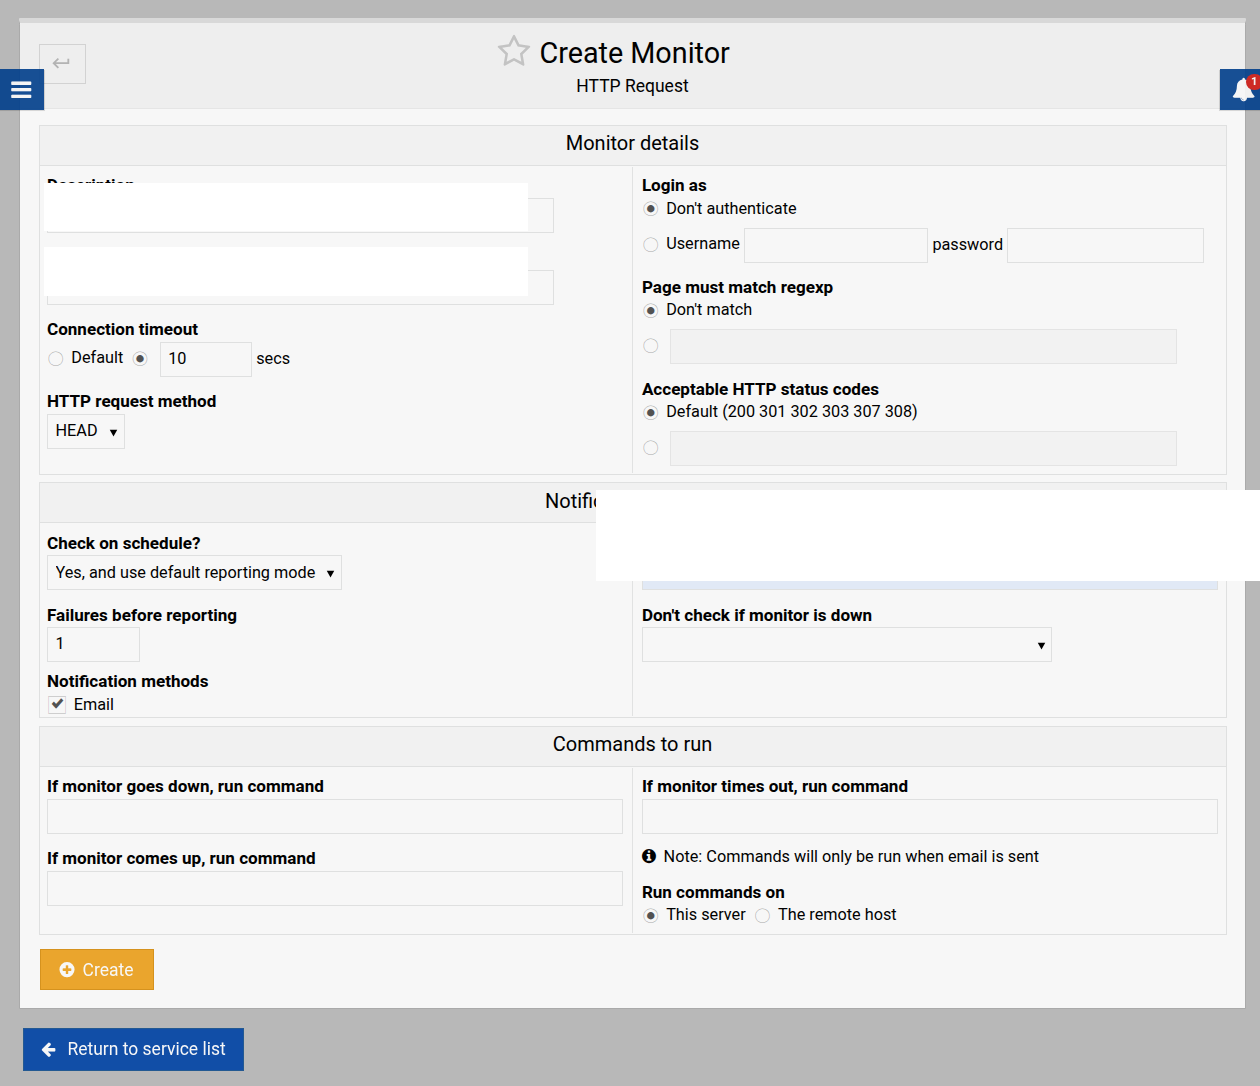
To check that the website is up at all times, we add a “Remote HTTP Service” monitor to a Webmin installation. This should be done on another web server than the one hosting the current Moodle site.
Go to Tools > System and Server Status and click on the button Add monitor of type, while HTTP Request is selected. This should take you to the following screen:
Set the field “Connection timeout” to 10 seconds. This should also notify you if the loading times for the Moodle website get unacceptable (i.e. more than 10 seconds).
9. Share Access Credentials
If the Moodle installation is completely ready, and no further content editing is required, notify your users directly. In your email, include:
Url for the new Moodle installation
Username
Password
At any rate, send the company’s Moodle admin account (username and password) for this installation to the lead developer (the lead engineer, at the time of writing), including MySQL's password, the Unix password and the url. Be sure to do that in a secure way.
With the site running, the next question is how you find out when it is not: monitoring a Moodle web server covers datacenter alerting and application-level checks.
Moodle's standard way to build AMD JavaScript is its grunt toolchain, which pulls in Node, Babel and a fair amount of configuration. If you just want to compile a plugin's amd/src/ files into the amd/build/*.min.js that Moodle serves, esbuild is a much lighter alternative. The key to doing it cleanly is to author named AMD modules so the output loads exactly like a grunt-built module. This guide covers that setup, configuration, and the build workflow.
Using esbuild to Build AMD Modules in a Moodle Plugin
Purpose
To compile JavaScript source files in amd/src/ into the AMD .min.js files in amd/build/ that Moodle loads, using esbuild instead of grunt.
Directory Structure
Your Moodle plugin should contain:
mod/yourplugin/
 amd/
    src/
       editor.js
       runtime.js
    build/      (created automatically by esbuild)
Each source file must begin with a named AMD define() block. The module name has to be plugintype_pluginname/filename, matching the plugin's component name and the file's path under amd/src/. This is the crucial detail: baking the name in yourself is what lets Moodle load the module directly, without relying on any server-side fix-up (see the note at the end).
Author each source file as a named module: define('plugintype_name/file', [...], ...)
Create build.js (minify + sourcemap, no format override)
Run node build.js or npm run build
Moodle loads your AMD modules from amd/build/*.min.js
Why the module name matters
Moodle's AMD loader expects every module to declare its own name (define('plugintype_name/file', ...)). The grunt toolchain injects that name automatically during its Babel step. esbuild does not, so you add it yourself in the source. If you omit the name and emit an anonymous define([...]), Moodle will still load it, but only because lib/requirejs.php runs a fallback (requirejs_fix_define()) that patches the name in at serve time. That fallback is explicitly marked in core as deprecated and slated for removal, so do not rely on it: name your modules and the output loads on its own merits.
A caveat on the plugins directory
If you submit a plugin to the moodle.org Plugins directory, its automated checks include a grunt build-state step that rebuilds amd/src/ and compares against the committed amd/build/. esbuild output will not byte-match grunt's, so a submitted plugin built this way may be flagged for mismatched build files. For in-house or client plugins this is a non-issue; for directory submissions, run the standard grunt build for the final committed artifacts.
Testing that Moodle plugins correctly post data to remote endpoints requires a local test server to capture requests. This guide shows how to set up a simple PHP endpoint, configure the plugin, and inspect the actual HTTP payloads being sent. It assumes a working local test environment; setting up a PHP 7.4 and PHPUnit toolchain for Moodle covers building one.
Testing Moodle Plugins That Transmit Data to a Remote Endpoint
Purpose
To verify that a Moodle plugin correctly sends data (e.g., grades) to a remote web service (typically via HTTP POST) when specific events are triggered, such as grading an assignment.
Prerequisites
Moodle instance with the plugin installed and enabled
Access to the Moodle server (for grading and logs)
PHP CLI available (7.4+)
A terminal: Bash/Zsh on Linux/macOS, or PowerShell/CMD on Windows
Optional: curl or Postman for manual POSTs
Step 1: Set up a fake local endpoint
Linux / macOS
Create a test directory and a small index.php that prints whatever it receives:
Start the built-in PHP server and leave the terminal open; incoming requests are printed here:
php -S localhost:8000
Windows
Download PHP from https://windows.php.net/ and extract it to C:\php, then add C:\php to your PATH.
Create the folder C:\phpwstest and place the same index.php as above inside it.
Start the server from CMD or PowerShell:
cd C:\phpwstest
php -S localhost:8000
Step 2: Point Moodle to the local endpoint
In the plugin settings, set the endpoint to your local test server: http://localhost:8000
Ensure the plugin’s event observer is registered in db/events.php (your plugin may differ):
'callback' => 'local_yourpluginobserver::graded',
Confirm the observer method exists and is correctly namespaced:
public static function graded($eventdata) {
    // your handling code
}
Note: if the plugin makes its outbound call through Moodle’s own curl class, Moodle’s cURL security may block requests to localhost by default. If nothing reaches your test server, see our guide on allowing Moodle cURL requests to localhost for development.
Step 3: Trigger the event
Grade an assignment, or perform whatever action triggers the event.
Watch the terminal running the test server.
Example terminal output:
=== LOG FROM index.php ===
=== REQUEST METHOD: POST ===
Content-Type: application/json
=== BODY ===
{"grade":"77.00000","gradetype":"point","activityid":"15030","userid":"145404"}
=== PARSED JSON ===
Array
(
    [grade] => 77.00000
    [gradetype] => point
    [activityid] => 15030
    [userid] => 145404
)
Step 4: Debug if nothing appears
Confirm the plugin is enabled.
Confirm the correct Moodle event is actually triggered by the action.
Confirm the callback in db/events.php matches your observer class and method.
Add temporary debug logging, e.g. error_log("Triggered observer::graded()");, and check the web server logs.
Ensure the outbound request uses CURLOPT_RETURNTRANSFER => true (or the equivalent on Moodle’s curl class) so the call completes.
If you use Moodle’s curl class, check whether cURL security is blocking localhost (see Step 2 note).
Success criteria and cleanup
The endpoint receives a POST request with the expected keys and values.
No errors are logged in Moodle or PHP.
When done, press Ctrl+C to stop the test server and revert the endpoint configuration.
Moving a Moodle install to a new server and domain requires careful pre-flight checks, code and database migration, DNS updates, and configuration adjustments. This guide covers the complete procedure with emphasis on avoiding downtime. One thing that breaks quietly after a move is certificate renewal: see fixing Certbot auto-renewal after moving Moodle's webroot.
Pre-flight check.
Before proceeding, please double check that you have proper answers to the following questions at hand. Triple-check with the lead engineer if you have any doubts because a mistake throughout this process will result in publicly visible downtime at the very least.
Is the Moodle website using recaptcha? Unless the Recaptcha settings are modified the DESTINATION website will not have functioning captchas thus blocking users from registering and/or logging in.
Do you have root access to both servers?
Is the SOURCE website in maintenance mode? What window of time do you have for this process? If everything goes as expected you should be done in an hour or two, but if you encounter any hiccups it will take longer.
Do you have admin credentials for Moodle? What about root credentials for the database?
Does the DESTINATION server have the same post_max_size and upload_max_filesize php settings (usually in php.ini) as the SOURCE server? Otherwise users may run into upload limits of 2 MB.
Does the DESTINATION server have the same locales installed? Check this with locale -a (under Ubuntu Linux).
Are there any logging processes on the DESTINATION server that tend to eat up a lot of disk space, such as log_bin on MySQL? If so, turn them off if possible.
Does the DESTINATION server have enough free disk space? Check with df -h
apachectl configtest to test whether the config files are properly written.
service apache2 reload to process changes to the configuration.
The web server software: Apache (version 2.2 or 2.4, depending on the host OS version). This is important because some of the syntax has changed between those releases, but we will address that later in this document.
The database: MySQL.
The Moodle website folders, located on /home/<website name>/public_html. As you can guess, each website gets their own user. This will be relevant shortly.
The moodledata folder, usually located on /home/<website name/moodledata, contains files that are uploaded or created by the Moodle interface. The location of this folder will be specified in /home/<website name>/public_html/config.php.
First of all, we need to create the user and folder structure. Let’s get the uid of the SOURCE user:
As we can see, the uid is 1025. We will create a user with this same uid on the new system.
After creating it we are going to switch users, create the folder structure and assign the proper permissions so we can transfer files later.
If the UID were to be already in use, don’t worry. Create the user with a different UID and remember this when we are transferring the website files over to the destination server.
To create a backup of the database, first we need to know which database Moodle is using. This information can be obtained from the config.php file, like so:
And to back it up we use the following command:
This folder now contains the Moodle website, the moodledata folder and the database backup we just made. To transfer it to the new server, we are going to use Rsync and ask rsync to preserve all extra attributes (owner, permissions and so forth) with the “-a” switch.
“-a” will take care of assigning the proper permissions to the folder, so the files are accessible for Apache too.
This will take a while, and Rsync will keep us informed of the progress.
If earlier we had to create the user with a different UID, we can manually fix permissions in the DESTINATION server at this moment with the following set of commands.
Now that the website folder is in place, we need to add the site to Apache’s configuration. To do that, we will copy the original website from SOURCE:/etc/apache2/sites-available/<website>.conf into DESTINATION:/etc/apache2/sites-available/<website.conf>. We need to tweak some of the configuration parameters on DESTINATION, namely:
ServerName must match the new domain, if it changes. Same with ServerAlias (i.e. if the original website contained any ServerAlias instructions, they will have been copied over through the .conf file).
ErrorLog and CustomLog must have their paths modified to include the new domain name, if relevant.
To check for this, run apache2 -v in both the source and the destination. This will present a problem, as Apache made significant changes to the configuration directives between those two versions. You might encounter this scenario when the source server is Debian and the destination server is Ubuntu, due to their different packaging policies.
In this case, we are only concerned about one change: The way directory permissions are specified. We need to turn “allow from all” into “Require all granted”. The following is a snippet of an actual configuration file, before and after the change-
Before:
<Directory /home/yoursite/public_html>
Options -Indexes +IncludesNOEXEC +SymLinksIfOwnerMatch
allow from all
AllowOverride All Options=ExecCGI,Includes,IncludesNOEXEC,Indexes,MultiViews,SymLinksIfOwnerMatch
</Directory>
After:
<Directory /home/website/public_html>
Options -Indexes +IncludesNOEXEC +SymLinksIfOwnerMatch
Require all granted
AllowOverride All Options=ExecCGI,Includes,IncludesNOEXEC,Indexes,MultiViews,SymLinksIfOwnerMatch
</Directory>
If you do not check for this properly, Apache would error out when loading the new website configuration leading to downtime for every website on that server.
Moodle has a scheduled task that runs every minute, and takes care of running a variety of scheduled tasks at regular intervals (like sending mail, updating Moodle reports, RSS feeds, activity completions or posting forum messages).This scheduled task needs to be added to Apache’s crontab. To do so, we run the following command:
DESTINATION --: crontab -u www-data -e
And this is the line we need to add (careful, it is just one line with no breaks):
(It’s not necessary to use cgi-fcgi in order to run a specific php version on the command line.)
Running the “replace” script to update references to the domain name.
If we have changed the domain name, we need to run this tool so Moodle can update it’s internal references to the new domain. To do so, we run the following command on the DESTINATION server.
Updating the domain name in Moodle’s configuration
If the domain name has changed, you need to update /home/<website>/public_html/config.php so wwwroot points to the new domain name.
$CFG->wwwroot = 'https://<URL>';
In addition, you will also need to clear the caches (‘purge all caches’), especially for Totara, which caches the domain name for menu items like the gear icon (or cog wheel, in British English).
Adjust Quota
If you’re using something like Virtualmin to create the vhost, adjust the quota (usually 1GB or 2GB by default) – otherwise you will soon run into the limit.
Solving Database Connection Errors
If you run into any database connection problems, they may be due to using a recent MySQL version and an older Moodle version. Here are the known issues we have run into:
Authentication issue when using ‘traditional’ native MySQL native password
Using Moodle 2.x with MySQL 8
Authentication Issue
Add default-authentication-plugin=mysql_native_password to the [mysqld] section of /etc/mysql/mysql.conf.d.
Change the authentication method for the database user:
ALTER USER example-db@localhost IDENTIFIED WITH mysql_native_password BY 'thepassword';
Using Moodle 2.x with MySQL 8
If you are using a very old Moodle version, such as 2.x, together with a newer version of MySQL, e.g. version 8, then you will need to make some changes to the source code. You will also need to address the authentication mentioned above.
Change the code in lib/dml/mysqli_native_moodle_database.php, line 523:
$sql = "SELECT column_name as `column_name`, data_type as `data_type`, character_maximum_length as `character_maximum_length`, numeric_precision as `numeric_precision`, numeric_scale as `numeric_scale`, is_nullable as `is_nullable`, column_type as `column_type`, column_default as `column_default`, column_key as `column_key`, extra as `extra`
 FROM information_schema.columns
To summarize: add aliases for every single column name.
It may also be necessary to make an additional change if you get the error message Unknown system variable 'storage_engine'.
Fix this issue by editing lib/dml/mysqli_native_moodle_database.php. Replace:
@@storage_engine
with
@@default_storage_engine
(In two places, in this case.)
There will still be a notice:
Notice: Undefined index: engine in /home/example-client/public_html/lib/dml/mysqli_native_moodle_database.php on line 173
But that will be ignored if you turn off full debugging mode.
Install a database backup script
The following is superseded by the section Configure backupvhost.php Script for Backups from “Installing a New Moodle Website on a VPS”.
Our data center (Hosting Provider) creates daily backups of the entire file system, for a window of fourteen days. This also includes the binary database files. But these can be hard to restore on another system. Therefore, we install a Bash script that creates a database dump and compresses it in one go. Here’s an example script:
This script creates a zipped database dump which will be included in the data center’s daily backup. Together with the public_html and the moodledata directories, this file can be used to completely restore a working Moodle installation on another system, should the need arise.
“The –single-transaction flag will start a transaction before running. Rather than lock the entire database, this will let mysqldump read the database in the current state at the time of the transaction, making for a consistent data dump.”
Create a db-backup directory in the home directory.
Use vim or another text editor to create the [customer]-backup.sh script inside the db-backup directory.
Set the owner to your users: chown -R [customer]:[customer] /home/[customer]/db-backup
Set the permissions to 770: chmod -R 770 db-backup
Give the database user (example-db in this example above) the proper permissions to user mysqldump: PROCESS (‘Manage processes’ in Webmin)
Check that the script is actually working properly: su (change user) to [customer] then run the script manually and check the contents of the zip file.
If you run into a disk quota issue: set the quota to unlimited for both the user and the group.
Create a cron job to execute the script on a daily basis, e.g. one hour before midnight (at that moment the data center starts their own backups). Use Webmin to create the cron job, but you can also use crontab:
@daily /home/[customer]/db-backup/[customer]-backup.sh #Creates a daily backup of the [customer] database (as a gz file)
The next day, check that the script has run properly (the timestamp should be shortly before midnight).
Here’s the Bash script without a specific customer’s name:
Typically, we have a Let’s Encrypt certificate installed for the domain, as well as the ‘www.’ version of the domain.
After migrating the site, run the following command to make sure the certificates are still in place and get renewed automatically:
certbot -d [thedomainname] -d www.[thedomainname]
(leave out the square brackets while typing in the command)
If there is no www.[thedomainname] version, skip that part.
You can test the results by visiting the website and checking that the certificate’s validity date starts today.
If you have certbot running on the old server, make sure you disable it for the old domain (unless you still need it).
Enabling the new website and testing that everything works.
To enable the new website, we need to run the following command on the DESTINATION server:
a2ensite <website>
service apache2 reload
You should be able to visit the domain now, and see the Moodle “maintenance” page. Log in with your admin credentials at https://websitedomain.com/login/ and browse through the courses. You should be able to access both courses and files, if the server is working correctly.
Test Email
Don’t forget to test the email delivery. To prevent the system from sending out emails to everyone before you’re ready, use this directive in config.php:
Now use the email test plugin to see if the system is still sending out email properly.
Disable Maintenance Mode
After you have checked that everything is working fine, use Administration > Site administration > Server > Maintenance mode to take the website out of maintenance mode.
Possible issues.
The embedded videos don’t work.
We use Vimeo as a video hosting service, and it is configured to only allow embedding from certain domains. If we are migrating to a new domain, we will need to add it to Vimeo’s settings so we can access the material.
Check with the lead engineer for more details.
The upload limits are too low.
Moodle allows users to upload files in a number of places. The upload limit (size of uploaded file) may be too low if the php.ini settings for the server have not been changed. You can check this under /admin/phpinfo.php – or Site administration > Server > PHP info – where you need to look for the post_max_size and upload_max_filesize settings. These should be 1000M. If they are not, change the php.ini file (you can't do that in Moodle, this is a server administration task).
Mailgun is no longer working
On one migration we had to switch to port 465 with SSL to get outbound mail working again after moving the site to the new server, so if email fails post-migration, try that combination.
If you want to make sure that the system can send out email at all, use your own email provider (e.g. Gmail through smtp.gmail.com:465) to test.
Mailgun is no longer free. Consider using something like Mailjet.
MySQL Database Import Fails
If you can’t import a large DB dump because you encounter the following error message:
ERROR 2013 (HY000) at line 21770: Lost connection to MySQL server during query
Then check if you also have a memory error message somewhere. I had to edit /etc/mysql/mysql.conf.d/mysqld.cnf and change innodb_buffer_pool_size from 8589934592 to 4294967296:
Once we have taken the new Moodle site out of maintenance, we are going to redirect visitors from the old domain to the new one. To do this, we edit /etc/apache2/sites-available/<website>.conf and add a new Redirect directive.
RedirectMatch ^/(.*)$ https://<new domain>/$1
Streaming a tarred moodledata directory from SOURCE to DESTINATION
Overview
For very large moodledata directories (tens or hundreds of gigabytes), traditional copying methods like scp or rsync can be too slow or can run into memory/disk limits. A more robust approach is to stream a tar archive over SSH, unpacking it immediately on the DESTINATION server without creating a temporary tar file. This method:
avoids creating a giant .tar file on disk
avoids double I/O (read + write on both ends)
is resilient and efficient
can be monitored with pv (pipe viewer)
works across servers as long as firewall rules permit SSH traffic
This section documents the complete process.
Prerequisites
Before streaming moodledata:
You must be logged in on the SOURCE server.
The DESTINATION server must allow SSH connections from the SOURCE server’s IP address. (If the firewall blocks it, the stream will freeze at the SSH step.)
SSH public-key authentication must be working between SOURCE and DESTINATION.
You should use screen so that the transfer continues even if your session disconnects.
Understanding the Components
1. tar -C /path -cf – .
This command creates a tar archive on STDOUT instead of writing to a file.
-C /path changes into the moodledata directory before tarring. This ensures we put only the contents into the stream, not the folder itself.
-c means create archive
-f - means write the archive to stdout
. means "archive everything in this directory"
Example:
tar -C /home/webroot/leren/moodledata -cf - .
This produces a byte stream representing the entire moodledata contents.
2. pv (Pipe Viewer)
pv sits between the tar creation and the ssh transmission:
tar ... | pv | ssh ...
It shows:
total bytes streamed
current throughput
ETA
If pv is not installed, you can remove it — the stream will still work, just without progress feedback.
3. SSH agent forwarding (ssh -A)
If you connect to SOURCE from your laptop and then connect from SOURCE DESTINATION, you often need your local SSH keys available on the SOURCE machine. Using ssh -A forwards your SSH agent:
ssh -A source.example.com
This makes your laptop’s SSH key available transparently on SOURCE, so SOURCE can authenticate to DESTINATION without storing private keys on SOURCE.
If authentication fails or the agent doesn’t forward, DESTINATION will reject the connection.
4. Unpacking on DESTINATION (tar -C /path -xf -)
On DESTINATION, we unpack the incoming stream immediately:
-C /path = change into the target moodledata directory
Mailgun handles the infrastructure complexity of transactional email: reputation management, DKIM/SPF verification, and delivery tracking. This guide covers account setup, DNS configuration, SMTP integration with Moodle, and testing delivery from both the CLI and within Moodle.
Notes
Through this document we will use example-training.com as a test case, however any username or credentials shown will have been modified to be intentionally invalid for obvious reasons.
Mailgun is no longer free. Consider using something like Mailjet.
Pre-flight check.
We use a new mailgun account for each environment. Create a new account based on the current project and make sure to save and forward the credentials to the lead engineer. Best to use a custom email address for future transfer possibilities, e.g. example-training@your-domain.com.
Verify you have the right credentials, and that you are able to login to the following services:
Mailgun account.
Moodle site administration.
Domain DNS settings, these might live inside the Domain Registrar’s administration panel, or they might reside in an external service (Cloudflare, for example).
Specifically, it is common for services like Mailgun and DNS settings to be protected by 2 Factor Authentication. If that is the case, you will need to coordinate with the lead engineer to find a change window with the client so they are able to forward the second factor tokens to you.
If you use GMail and have enabled login codes through an app or SMS, this is a good example of working 2-Factor Authentication.
It goes without saying that disabling 2-Factor Authentication is something we must not do once we are logged in. If necessary, multiple additional change windows can be requested.
Mailgun
What is Mailgun
Mailgun is an online service that provides a set of APIs for sending, receiving, tracking and storing email. It can be used through an HTTP REST API, or as a traditional SMTP server.
Mailgun handles all the complex email stuff: the software services themselves, and all the email dark arts that surround them (SpamHaus, shared IPs, IP reputation, warming up IPs, the software side of DKIM and friends). We can stick to the explicit action we want to perform: sending emails, and let Mailgun worry about the rest.We are going to use Mailgun in SMTP mode, and we will add their SMTP server to Moodle so transactional emails are sent this way.
Create an account for Mailgun
Go to https://signup.mailgun.com/new/signup and create an account. Use your own email address and for “company” a combination of Solin with the company name of your customer.
You also have to provide credit card details otherwise you can only send emails to 5 authorized recipients only. In case the account details are shared with your users, make sure that you do not share credit card details from your colleagues!
Save the login details of this account in your password wallet and send it also to the lead engineer.
Adding the domain to Mailgun
After logging into the account, enter the “Domains” section (navigation pane Sending>Domains) and click on “Add New Domain”.
At the “Add your domain” page fill out the following details and click on Add Domain:
Domain name: Always use a subdomain to prevent any problems with the root domain. Use in this case mg.example-training.com
US/EU: Select the location of the sending server: For all companies residing in countries except from US, select EU. For the United States, select US.
Create DKIM Authority: leave this checked and select the longest DKIM key that is possible.
Domain or subdomain? What is the difference?
Explained in simple terms, these domains are going to develop a reputation over time depending on the rate of email delivery and the amount of times our users click on “Mark as Spam”.
Using the root domain is possible when it doesn’t have any MX records yet. However, to prevent any problems, we will always use a subdomain when we implement Mailgun.
Now that we have added the domain, we need to prove our ownership of it to Mailgun.
Proving to Mailgun that we own the domain.
Mailgun allows us to send email from any address and domain, as long as we can verify them. To do so, we will add specific TXT records through the DNS server of the domain. These records are generated and shown as soon as you click on the “Add Domain” button. You can also find these records by navigating to Sending>Domain Settings and tab DNS records. Make sure you select the correct domain on top of the page.
The DNS settings might live inside the domain registrar’s interface, or they might reside in an external service if this guide uses other services to manage the DNS (Cloudflare, for example).
Finding out who manages the DNS servers for the domain
Login to your hosting provider. This account might be applicable for several domains.
Select the domain of the Moodle website.
Navigate to the DNS section. Look for a section called Advanced domain settings or Manage DNS.
Add all records with the type, hostname and value that Mailgun has provided:
Add two separate sending TXT records, one for SPF and one for DKIM. These are required to send and receive email with Mailgun.
Add two separate receiving MX records. Use for priority 10.
Add a tracking CNAME record. The CNAME record is what enables Open and Click tracking. This is highly recommended to reap the full benefit of Mailgun and gain insights into your email performance.
Once you have added all records, you can click in Mailgun at the DNS records page on the button “Check DNS Records Now” to verify the records. If they have been verified, you see a green check sign in front of the record.
You will also receive an email from Mailgun once the DNS records have been verified.
If you are not familiar with DNS’ innerworkings, it might surprise you to read that this change might take up to 48 hours to propagate. Basically, TTL is the amount of time that records will be kept in cache throughout the whole DNS hierarchy; from the root servers to the servers that you use as DNS servers (such as 8.8.8.8).
GoDaddy “Helps” by Adding Your Full Domain in Name Part
Please note that GoDaddy doesn't clearly tell you that it automatically appends the domain name to the "Name" field, which leads to lots of confusion, especially when you're used to entering full FQDNs (Fully Qualified Domain Names) elsewhere.In short, when using GoDaddy’s interface, do not enter the full domain name, just the subdomain you’re editing.For example, if you have this DNS record:
then you should enter this as “mail”.
Integrating Mailgun with Moodle.
Now that we can send emails as whatever@example-training.com, it’s time to configure Moodle to send email through Mailgun.
Obtaining the credentials from Mailgun
Go to Sending>Domain settings and click on the SMTP credentials tab.
Here you cannot see directly the password, but you can reset the password to be able to copy it to your password wallet and use it in Moodle.
Beware: Anyone with the password and SMTP login will be able to send email as <anyone>@domain.com. Treat these credentials with utmost care.
Configuring Moodle
Go to the Moodle website and log in as an Administrator.
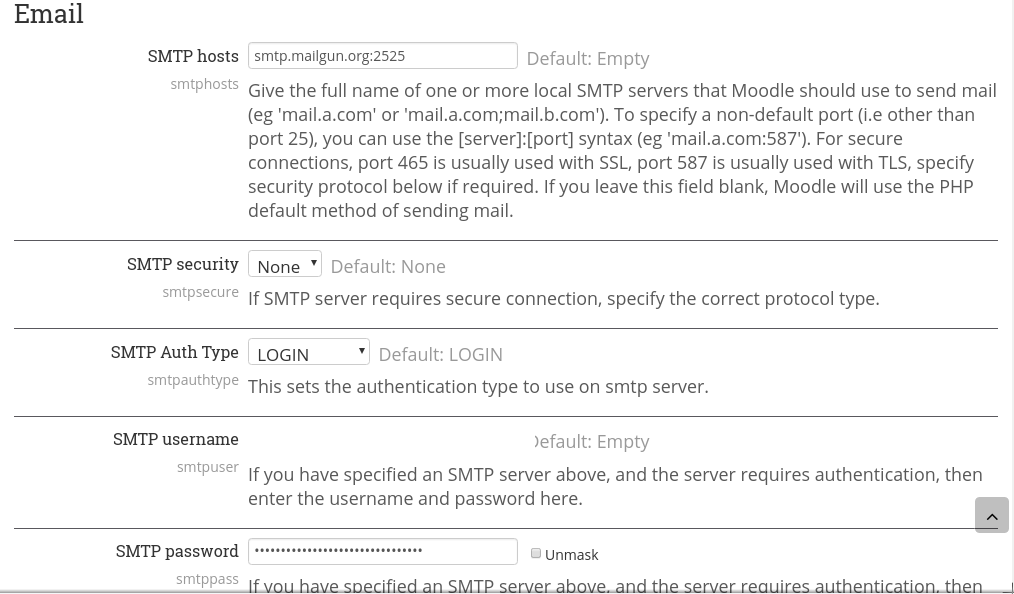
Click on Site Administration> Server> Outgoing mail configuration
Fill in the fields with the information obtained in the previous step, and click save.
If you want to have SMTP security enabled, please select the appropriate security mode.
For secure connections, port 465 is usually used with SSL, port 587 is usually used with TLS.
Done! Moodle is now configured to send email through Mailgun. Let’s test this setup, to confirm everything is working.
Send a test email.
From the shell.
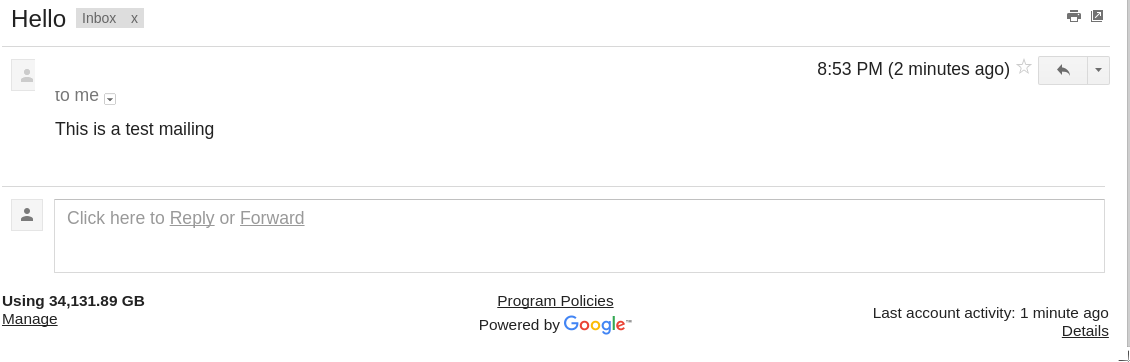
Using swaks (available in the Debian/Ubuntu repositories) we are going to send a test email that will come from onno@example-training.com.
$ swaks --auth --server smtp.mailgun.org --au postmaster@example-training.com --ap <smtp password> --from onno@example-training.com --to email@yourinbox.com --h-Subject: "Hello" Test
=== Trying smtp.mailgun.org:25...
=== Connected to smtp.mailgun.org.
<-  220 ak47 ESMTP ready
 -> EHLO MailDemo
<-  250-ak47
<-  250-AUTH PLAIN LOGIN
<-  250-SIZE 52428800
<-  250-8BITMIME
<-  250-ENHANCEDSTATUSCODES
<-  250-SMTPUTF8
<-  250 STARTTLS
 -> AUTH LOGIN
[..]
<-  235 2.0.0 OK
 -> MAIL FROM:<onno@example-training.com>
<-  250 Sender address accepted
 -> RCPT TO:<email@yourinbox.com>
<-  250 Recipient address accepted
 -> DATA
<-  354 Continue
 -> Date: Sun, 04 Feb 2018 20:53:12 +0100
 -> To: email@yourinbox.com
 -> From: onno@example-training.com
 -> Subject: Hello
 -> X-Mailer: swaks v20130209.0 jetmore.org/john/code/swaks/
 ->
 -> This is a test mailing
 ->
 -> .
<-  250 Great success
 -> QUIT
<-  221 See you later. Yours truly, Mailgun
=== Connection closed with remote host.
From Moodle.
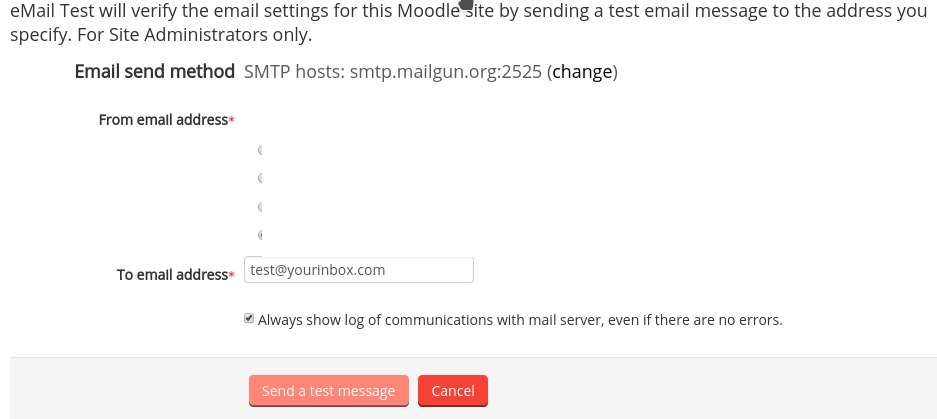
(Note: if the plugin is not installed, you can install it from https://moodle.org/plugins/local_mailtest. However, be mindful of your users’s environment! If you have any doubts about this step, please check with the lead engineer before proceeding.)
Go to Server/eMail Test and fill in the fields.
Moodle will show you exactly what happened, and if the email was sent successfully or not. Debug mode settings do not affect the rest of the website, and detailed output is always shown on error regardless of the debug settings specified in Moodle’s config.php.
Troubleshooting
SMTP ERROR: Failed to connect to server.
Either:
The SMTP security type does not match the port. Use TLS with port 587, or SSL with port 465; a mismatch (for example SSL on 587) causes the connection to fail.
Your hosting provider is blocking the outbound SMTP port. Mailgun listens on 25, 465, 587 and 2525, so if one is blocked, try another (2525 is the usual fallback).
Connecting Moodle to other systems? Solin offers Moodle integration services spanning email, HR, CRM, and ERP, delivered as a fixed-price project.
PsySH provides an interactive REPL for Moodle development, similar to `rails console`. This guide shows how to set it up project-locally with a custom init script, giving you direct access to Moodle’s database and API without polluting the repository.
This is a guide for Moodle developers who want to install and use PsySH on a per-project basis, using an init.php file to load Moodle and helper logic — without polluting the Moodle Git repo.
Installing and Using PsySH REPL for Moodle Development (Project-Scoped)
Overview
This guide helps Moodle developers:
Set up an interactive REPL (like rails console or irb) using PsySH
Run it within a Moodle context (with $CFG, $DB, $USER, etc.)
Keep all files outside the Git-tracked Moodle directory
Ensure correct PHP version is used per project
1. Requirements
PHP CLI (matching your project version, e.g. php7.4)
Composer (any global version)
Local Moodle install (e.g. in ~/php/icm/public_html/)
2. Install PsySH per project
Create a tools/ directory next to your Moodle root:
cd ~/php/icm
mkdir tools && cd tools
php7.4 /usr/bin/composer require psy/psysh:^0.11
This installs a project-local version of PsySH compatible with PHP 7.4. (Assumption: your webroot is something like ~/php/icm/public_html)
3. Create init.php to bootstrap Moodle and helpers
Totara's GraphQL API is powerful but poorly documented. Rather than relying on outdated reference materials, this guide shows how to use introspection queries to discover available queries, filters, and pagination options directly from your Totara instance.
If the Totara website is hosted on one of our own servers, we should already have this information – don’t bother your users in that case, but ask the lead engineer instead.
Create a GraphQL User in the Role of API User
Go to Home > Site administration > Users >Manage users and use the ‘Create user’ button to make a new user, e.g. ‘GraphQL User’.
Go to Home > Site administration > Permissions > Assign system roles and assign the new user to the API User role.
Add a New API Client
Go to Home > Site administration > Development > API > API clients > Add client.
Choose a name, and link the new client to the GraphQL user you just created.
Copy the client ID and secret to a secure place.
Test the API Client
Using the client ID and client secret, request a new token which you are going to use in a subsequent test call:
curl -X POST 'https://portal.woodgrove-logistics.example/totara/oauth2/token.php'
  -H 'Content-Type: application/x-www-form-urlencoded'
  -d 'grant_type=client_credentials&client_id=*******&client_secret=*******'
This should return the token, which you can use in your next test call:
Please note that the Totara documentation for their GraphQL API (schema) is not very good. Instead, you should probably rely on querying the schema.
I have asked ChatGPT (o1) to explain a drill down I did to construct the test query mentioned above (get the first 50 suspended users):
Below is a concise recap of the introspection calls we made (and why):
1. Top-Level Queries
Call
{
  __schema {
    queryType {
      fields {
        name
      }
    }
  }
}
What It Does
Fetches all top-level query names in your Totara site’s GraphQL schema (e.g., core_user_users, core_course_courses, totara_webapi_status, etc.).
This helps you discover which queries actually exist in your environment (since Totara’s online documentation might not match your custom or specific build).
2. Introspecting a Specific Query Type
Call
{
  __type(name: "core_user_users_query") {
    name
    inputFields {
      name
      type {
        name
        kind
        ofType {
          name
          kind
        }
      }
    }
  }
}
What It Does
Looks at the input object for the core_user_users query, which is named core_user_users_query.
Tells you which fields are available on that input type (e.g., filters, pagination, sort).
This shows how you must structure your "variables" when calling core_user_users.
3. Introspecting the Filters Object
Call
{
  __type(name: "core_user_users_filters") {
    name
    inputFields {
      name
      type {
        name
        kind
        ofType {
          name
          kind
        }
      }
    }
  }
}
What It Does
Zeroes in on the filtering options for the core_user_users_query.
Reveals the fields you can use to filter users (e.g., status, since_timecreated, since_timemodified).
Important for building your "filters": { … } object when requesting suspended/active users.
4. Introspecting the Pagination Object
Call
{
  __type(name: "core_pagination_input") {
    name
    inputFields {
      name
      type {
        name
        kind
        ofType {
          name
          kind
        }
      }
    }
  }
}
What It Does
Shows the pagination fields for core_user_users_query (or other queries that accept pagination).
Typically returns fields like limit, page, cursor.
Tells you how to structure the "pagination" object in your variables (e.g., "pagination": { "limit": 50 }).
5. Checking an ENUM Type (User Status)
Call
{
  __type(name: "core_user_user_status") {
    name
    kind
    enumValues {
      name
      description
    }
  }
}
What It Does
Fetches the enum values (e.g., ACTIVE, SUSPENDED, ALL) used in the status filter.
Tells you the exact strings you can pass in the filters.status field ("SUSPENDED", "ACTIVE", etc.).
Why Introspection?
Totara’s GraphQL schema can vary by version or customization. Introspection lets you see exactly:
Which queries your site supports.
What input objects (filters, pagination, etc.) those queries expect.
What fields those input objects have.
Which types (e.g., scalars, enums, etc.) you need to pass in.
By combining that info, you build the correct GraphQL query + variables, ensuring you don’t get errors like “Field X is not defined.”
Summary
Top-Level Query Introspection (queryType) showed which queries exist in your Totara site.
Specific Type Introspection (__type(name: "xyz" revealed the exact input fields for those queries, including filters, pagination, and enums.
Each step helped us pin down precisely how to structure our "variables" so that Totara 18’s GraphQL endpoint would recognize our requests for suspended users (via status = "SUSPENDED") and handle pagination (limit, page, etc.).
Here’s the basic logic behind why the query structure includes filters and pagination parameters (and sometimes sort) for core_user_users in Totara 18:
1. Strongly Typed Input Objects in GraphQL
Totara’s GraphQL schema is designed so that each query can accept one or more input objects rather than a bunch of individual arguments.
In this case, core_user_users expects a single parameter called query, which itself is an object of type core_user_users_query.
That core_user_users_query object is defined to have three sub-fields:
filters: core_user_users_filters
pagination: core_pagination_input
sort: [ someSortType ] (optional, as a list)
This is a common GraphQL design pattern: the query accepts an input object so that filtering, sorting, and pagination are all grouped in one place instead of being separate arguments.
2. The filters Sub-Object
The filters sub-object is specifically where you set conditions on which users to return.
From your introspection, you saw that filters has:
status: core_user_user_status (an enum with ALL, ACTIVE, SUSPENDED)
since_timecreated: core_date
since_timemodified: core_date
In other words, if you want only suspended users, you set:
"filters": {
  "status": "SUSPENDED"
}
If you want all users, you could set "status": "ALL" or just leave the filters object empty (depending on how Totara is configured).
3. The pagination Sub-Object
The pagination sub-object deals with how many items you get back and/or which “page” you’re on:
limit (the maximum number of results to return)
page (a page number)
cursor (an alternative approach for “cursor-based” pagination)
In your working example:
"pagination": {
  "limit": 50
}
tells Totara to return up to 50 suspended users in one response. If there are more than 50, you’d need to check next_cursor (or specify page) to retrieve additional sets of results.
4. Bringing It All Together
So the GraphQL call to core_user_users looks like:
Query definition:
query core_user_users($query: core_user_users_query) {
  core_user_users(query: $query) {
    items {
      id
      username
      firstname
      lastname
      email
    }
    total
    next_cursor
  }
}
You can use this to sort by first name ascending, if the schema supports that.
5. Why Totara Uses This Approach
Consistency: Many Totara GraphQL queries follow the pattern of a single “input object” with sub-fields for filtering, sorting, and pagination.
Scalability: As more filters or pagination modes are added in future versions, Totara can just extend the input type instead of adding separate arguments.
Clarity: The naming (e.g., filters, pagination, sort) makes it easy to see what each piece of input does.
In Short
filters is where you define the “condition” on users: suspended, active, etc.
pagination tells Totara how many results to return (limit) and which “page” or cursor to start from.
That’s why your GraphQL request must nest these properties inside a single query input object—it’s how Totara 18 structures the request to keep the API consistent and strongly typed.
Totara’s HR Import automates user provisioning from CSV files via SFTP, supporting delta or complete imports of users, organizations, positions, and job assignments. This guide covers setup, custom profile field mapping, and transitioning from manual testing to fully automated imports.
Assumptions
This guide assumes:
The customer has an external system from which they want to import data into Totara.
They can provide CSV files through SFTP in an automated way (we do not cover any other data sources for HR Import in this guide yet).
Element: determines which type of data can be imported — Job assignment, Organisation, Position, and User.
Source: for each element, you can configure a data source. For example, the User element can be fed from a CSV file or an external database.
SFTP: Secure File Transfer Protocol, used to copy files from one host (e.g., a web server) to another over the internet.
Public–private key pair: to provide secure, passwordless access to the SFTP server, ask the customer for their public SSH key and add it to the .ssh/authorized_keys file on the web server. Their private key handles encryption on their end.
Provide Sample CSV Files and Documentation
Most customers ask for an example of the CSV files. Use spreadsheets to list the column headers and provide a row of sample data. Also add a clearly delineated row of documentation (explaining the data types, uniqueness requirements, and so on).
If the site is using any custom profile fields, you must adapt the sample CSV files and documentation accordingly. Here is an example: HR Import Samples Plus Instructions.
The file names for automated HR Import should be:
Users: user.csv
Job assignments: jobassignment.csv
Organisations: org.csv
Positions: pos.csv
Ask for a Public SSH Key for SFTP
In this scenario, the customer will set up an automated process to upload their CSV files to the Totara web server via SFTP. To make this easy and safe, ask them to send over their public SSH key and add it to the .ssh/authorized_keys file (or ask the system administrator to do this).
Since we don’t know anything about the customer’s system (and don’t want to), we’re not going to explain how to set up an automated upload process or how to generate a public–private key pair.
Configure HR Import
In this section, we’re going to configure HR Import for the customer’s data. One important note: don’t automate the import yet. Test manually first (see Test the Customer’s CSV Files), then switch to automation (see Automate the HR Import).
Delta vs. Complete Import
It is worth understanding what happens when you set “Source contains all records” to “Yes”. This is not spelled out explicitly in the documentation, but combining the various descriptions, the behavior is as follows:
Users who are present in Totara but missing from the source file will be removed.
What removed means depends on your “Allowed HR Import actions” > “Delete” setting: keep, suspend, or full delete. A full delete removes all user data, including associated records (grades, appraisals, etc.).
The recommended setting is suspend rather than full delete.
If you are only importing a delta, include a deleted column in your source file (0 for retained users, 1 for users to be removed).
The following is documented: for the source user, there is a timemodified field. The documentation states:
If you want records to be updated every time an import is performed and not take the Unix timestamp value into account, you can specify a zero (0) value for this field. This will effectively force HR Import to import the data every time and ignore changes in Unix timestamp values.
Check the Customer's SFTP Upload of the CSV Files
The goal here is twofold:
Make sure that the CSV files were transferred to the correct directory on the web server (a directory that must also be readable by Totara).
Check the format of the CSV files.
Format of the CSV Files
Check the uploaded CSV files against the documentation and samples you provided earlier. Keep a sharp lookout for custom profile fields. These must have a column header in the following format: customfield_[shortname] (replace [shortname] with the actual short name, without brackets).
Test the Customer's CSV Files
If the CSV files are present on the web server and their formatting is correct (see the previous section), test the actual import. Use a test version of Totara to do this.
Automate the HR Import
Scheduling is driven by the HR Import scheduled task (provided by the tool_totara_sync plugin); enable it and set its frequency under Site administration > Server > Scheduled tasks. HR Import expects the following folder structure on the server:
In the HR Import settings, set the files directory to the root of this structure (i.e., path-to-totara, without the csv/ready suffix). Totara appends csv/ready automatically.
Place CSV files in the ready folder before each scheduled run. After the import completes, Totara moves them to the store folder and appends a Unix timestamp to each filename. The store folder is created automatically on the first run; if Totara lacks permission to create it, create it manually beforehand.
Agree with the customer on a retention policy for files in the store folder.
Want this built for your HR system? Solin provides Moodle & Totara HR integration services, including automated user synchronization from Workday, SuccessFactors, and other systems, delivered as a fixed-price project.
LTI 1.3 is the standard that lets one system launch learning content that lives in another. A learner clicks a link in the system they already use, and a course or activity hosted elsewhere opens for them as though it were local, carrying their identity across and sending their grades back automatically. That lets you bring in a course another organization hosts, or share a course you host so that partners’ learners can take it without leaving their own environment. Both systems can be Moodle, but they do not have to be: the other end could just as easily be a different LMS or a specialist content or assessment provider.
Whichever direction you are setting up, it works the same way once you know which side plays which role, and the single most common reason a setup goes wrong is that the two roles, Platform and Tool, get swapped. This guide focuses on the Moodle side of the connection. It anchors that distinction first, then walks through registration, publishing, adding the launch link, and the launch errors you are most likely to hit.
Platform and Tool: the distinction everything depends on
The clearest way to hold the two roles in your head is to ask which site hosts the content and which site launches it.
The Tool is the site that hosts the content. It owns the course or activity and delivers it when it is launched.
The Platform is the site that launches the content. It is where the learner sits and clicks the link to open that course or activity.
The reason this trips people up so often is that the names feel backwards. “Platform” sounds like the big, primary system and “Tool” sounds like a small add-on, so the instinct is to make your own main Moodle the Platform and treat the other site as the Tool. But the roles are defined by who owns the content, not by which site feels more important. The Tool owns and serves the activity; the Platform is simply the place learners launch it from, which is usually your own everyday Moodle.
It helps to remember the older LTI 1.1 names, because they describe the roles more plainly. The Platform used to be called the Consumer, and the Tool used to be called the Provider. The Provider provides the content and the Consumer consumes it. If you keep “provider is the Tool” and “consumer is the Platform” in mind, the direction stops slipping.
LTI 1.3 term
Old LTI 1.1 term
What it does
Tool
Provider
Hosts the course or activity and delivers it when launched
Platform
Consumer
Where the learner clicks the link to launch it
The roles work the same way whatever sits on the other end, but they are easiest to lose track of when both sides are Moodle, because then nothing in the interface reminds you which role a given site is playing. You have to decide it and hold onto it. Everything else follows from that one decision, including the single rule that causes the most failed setups: the registration URL is generated on the Tool and pasted into the Platform, never the other way around. Generate it on the wrong site and the registration will not describe the two-system relationship you meant to set up, so it usually fails outright, often with a message about the result not being valid JSON or the host being blocked. Pasting a site’s own registration URL back into itself is a special case: it configures Moodle against itself, which is only useful if you are deliberately testing both roles on one site. In a real two-system setup it almost always means the direction has been lost.
This is the most common source of LTI 1.3 pain, and it plays out regularly in the community. In the moodle.org forums you will find launch and registration failures that look like certificate or JSON problems but come down to a reversed Platform and Tool assignment. Before you debug certificates, cookies, or firewalls, be certain which site is which.
The rest of the LTI 1.3 vocabulary
A few more terms come up during setup. You do not need to master them, but recognizing them makes the error messages easier to read.
Registration is the trust relationship between the Tool and the Platform. It is set up once, either dynamically or by hand, and it is what lets the two sites believe each other’s messages.
Deployment is a specific activation of the registered Tool inside the Platform. It identifies a trusted launch context, and dynamic registration normally creates it for you. It is separate from the actual course or activity you publish, which you select later through Content Selection or through the published content’s Launch URL and custom properties.
Launch is the moment a learner clicks the link on the Platform and is carried into the Tool’s content.
Line items and scores are the part of the standard that sends grades from the Tool back to the Platform.
Decide the direction before you touch a setting
Before changing anything, work out which side is the Tool and which is the Platform. Throughout this guide, Moodle A is the Tool (it hosts the content) and Moodle B is the Platform (it launches the content). The walkthrough shows both sides as Moodle because that is the case you can configure end to end yourself, but the other end is just as often a non-Moodle system. When it is, follow the Moodle-side steps here and use the equivalent screens on the other platform. Either way, your situation is one of two directions.
You are consuming content from another provider. Your learners live in your Moodle, but the course is hosted elsewhere, whether that is another Moodle, a commercial content provider, or a specialist tool. The other system is the Tool, your Moodle is the Platform, and the registration URL must come from the other system and be pasted into yours.
You are providing content to another organization. The course lives in your Moodle, but learners launch it from a partner or customer platform, which may or may not be Moodle. Your Moodle is the Tool, their system is the Platform, and you generate the registration URL and hand it over for their administrator to paste into their platform.
Requirements
Any LTI 1.3 setup assumes both sides can reach each other as real servers over HTTPS. In most cases that means public URLs with valid certificates. Private, VPN, or staging URLs can work too, but only if each server can actually resolve and reach the other and Moodle’s blocked-host settings permit the connection. In practice that means:
Both sites use HTTPS with certificates each server trusts.
Each server can actually reach the other’s domain. The usual culprits when this fails are URLs the other side cannot resolve or connect to: localhost, private IP ranges, VPN-only hostnames, or staging URLs that are not reachable from the other server.
When your Moodle is the Tool, it needs both the LTI authentication plugin and the Publish as LTI tool enrolment plugin enabled. Moodle requires the authentication plugin alongside the enrolment one; it is how remote learners are provisioned an account on the Tool.
When your Moodle is the Platform, it needs the External tool activity available.
Whatever runs on the other end must be LTI Advantage compliant, and ideally supports dynamic registration.
Step 1. Enable LTI on the Tool site
Do this on Moodle A, the site that will host and deliver the content.
Log in as an administrator.
Go to Site administration > Plugins > Authentication > Manage authentication and enable LTI.
Go to Site administration > Plugins > Enrolments > Manage enrol plugins and enable Publish as LTI tool.
Optionally, open Publish as LTI tool > Settings to review the defaults, including the provisioning mode that controls how remote learners get an account.
If you want the Tool to display inside an iframe on the Platform rather than in a new window, also enable Site administration > Security > HTTP security > Allow frame embedding. Depending on browser cookie behavior, iframe launches may still need extra cookie configuration, which is covered in troubleshooting.
Step 2. Register the Tool with the Platform
Dynamic registration is the simplest way to exchange the LTI 1.3 configuration between the two sites. You start on the Tool, finish on the Platform, and confirm back on the Tool.
This walkthrough uses dynamic registration, which is the recommended path whenever both sides support it. Manual registration is also possible, but it means exchanging the issuer, client ID, authentication and token URLs, public keyset (JWKS) URL, redirect URLs, and deployment ID between the two systems by hand. Use it only when the Platform cannot do dynamic registration.
On Moodle A, the Tool
Go to Site administration > Plugins > Enrolments > Publish as LTI tool > Tool registration.
Click Register a platform.
Enter a Platform name that will remind you which site it is, for example the customer or organization name, then click Continue.
On the Tool details tab, copy the Registration URL shown under Dynamic registration.
That URL belongs to the Tool. It is meant to be entered on the Platform, and nowhere else.
On Moodle B, the Platform
Go to Site administration > Plugins > Activity modules > External tool > Manage tools.
Paste the registration URL into the Tool URL or Add tool field at the top of the page, depending on your Moodle version.
Click Add LTI Advantage. Moodle contacts the Tool, exchanges keys, and imports the configuration.
The tool appears in the list, often as pending at first. Review its settings and activate it.
Confirm the registration on Moodle A
Return to Publish as LTI tool > Tool registration on the Tool. The registration should now show as active, with the Platform details and a deployment stored automatically. With dynamic registration you normally do not need to edit the platform or deployment details by hand.
Step 3. Publish a course or activity from the Tool
Registration establishes trust between the sites, but it does not yet share any content. Do this on Moodle A to expose a specific course or activity.
Open the course you want to share.
From the course navigation or More menu, choose Published as LTI tools or Publish as LTI tool, depending on your Moodle version.
On the LTI Advantage tab, click Add.
Under Tool to be published, select the course or activity.
Enable grade sync and user sync if you need them, and optionally set a maximum number of enrolled users.
Save. Moodle now shows a Launch URL and a Custom properties value for this published content.
Copy the Launch URL and the Custom properties value. You will need them if you add the link on the Platform by hand. The custom properties identify exactly which published item to open, and look like this:
id=fe3dfbec-bd5b-4532-8bd5-0804a7102631
Step 4. Add the launch link on the Platform
There are two ways to place the link on Moodle B. Content Selection is the cleaner option when the teacher on the Platform can log in to the Tool and pick the content interactively. Manual link creation is for when you need to hand someone a fixed launch URL and property value instead.
Preferred: Content Selection
Confirm the registered tool is active on the Platform.
In the course where the link should appear, add an External tool activity, or pick the preconfigured tool from the activity chooser.
Click Select content.
If prompted, log in to the Tool and link the account.
Choose the published course or activity, add it, then save and launch.
This is usually the cleanest route because Moodle fills in the correct launch parameters for you. It does require the person creating the link to have, or be able to create, an account on the Tool site. If that is not possible, use manual link creation instead.
Alternative: manual link creation
Use this when Content Selection is not practical, for example when another administrator sets up the link without access to the Tool. On the Platform:
Add an External tool activity and choose the registered Tool.
Enter an activity name, and paste the Launch URL if Moodle asks for it.
Expand the advanced settings and paste the full Custom properties value into Custom parameters.
Save and launch.
Copy the custom properties exactly. Do not confuse the published content id with the LTI deployment ID; they are different values, and Moodle labels each where it means it.
Step 5. Test the launch
Test as a normal learner, not only as an administrator, because provisioning and permissions behave differently for the two.
Log in to the Platform as a test learner and open the course.
Click the External tool activity and confirm you land in the Tool’s content.
Check that the correct course or activity opens.
If grade passback is enabled, complete something and confirm the grade returns to the Platform. Passback can be asynchronous, so it may arrive after a scheduled task runs rather than instantly.
If user sync is enabled, confirm the learner is provisioned or linked as expected on the Tool.
Troubleshooting
“The result was not valid JSON” during registration
This appears during dynamic registration when Moodle expected an OpenID configuration in JSON but got something else. The full message usually reads along these lines:
There was a problem fetching the OpenID configuration from the platform.
The result was not valid JSON.
This may also be caused by blocked hosts configuration.
The most frequent cause is the direction mistake from the top of this guide: the registration URL was generated on the wrong site, or pasted back into the same site. Confirm that the URL came from the Tool and went into the Platform. After that, check the other common causes:
One of the URLs points at localhost, 127.0.0.1, or a private range such as 10.x.x.x, 172.16.x.x to 172.31.x.x, or 192.168.x.x, which the other server cannot reach.
Moodle’s blocked hosts or cURL security settings are preventing the server-to-server request.
The remote site answers with a login, SSO, maintenance, WAF, or error page instead of the expected JSON.
HTTPS is broken, or the certificate is not trusted by the other server.
The registration URL is stale. Delete the partial registration and generate a fresh one on the Tool.
Invalid launch data: custom claim ‘id’ missing
The Platform launched the Tool without the custom parameter that says which published content to open. On the Tool, copy the Custom properties value from the published content, then on the Platform edit the External tool activity and paste it into Custom parameters. Save and launch again.
Unable to find deployment
The Tool received a launch for a deployment it does not recognize or trust. Confirm the registration is active on the Tool, that the deployment exists under it, and that the Platform is using the correct registered tool. If you created several similar tools, make sure the Platform is not pointing at the wrong one. Dynamic registration normally creates the deployment automatically, so if it is missing, re-running registration usually restores it.
JWT signature or key errors
A JWT or key error means Moodle cannot validate the signed launch message. The usual culprits are a keyset URL that is unreachable, or a registration that was partly deleted or recreated on only one side. Confirm both sites use the correct registered tool, that the JWKS keyset URLs are reachable, and that no proxy, firewall, CDN, or WAF is blocking them. If in doubt, remove the registration on both sides and run dynamic registration again from scratch.
No grades are returned
Grade passback has several switches that all have to be on. Check that grade services are enabled in the Tool registration, that the External tool settings on the Platform accept grades, and that the published content on the Tool has grade sync enabled. Then confirm the launched activity actually produces a grade and that Moodle’s scheduled tasks are running, since passback is often processed asynchronously rather than at the moment of completion.
The Tool will not display inside an iframe
If the launch works in a new window but not embedded in the course page, the problem is almost always iframes or cookies. Confirm Allow frame embedding is enabled on the Tool, that both sites use HTTPS, and that the browser is not blocking the third-party cookies the session needs. Some setups require the session cookie to be marked for cross-site use:
SameSite=None; Secure
Only apply that change once you understand the security implications, and test it on staging before touching production.
A quick diagnostic checklist
When a registration or launch fails, run down these questions before anything else. Most of them come back to the Platform and Tool distinction.
Which site is the Tool, and which is the Platform?
Was the registration URL generated on the Tool and pasted into the Platform?
Can each server reach the other’s domain over HTTPS, and is that URL resolvable from the other server?
Is either site using localhost, a private IP, or a VPN-only hostname?
Is Moodle blocking the host through HTTP security or cURL blocked-host settings?
Is the registered tool active on the Platform, and the registration active on the Tool?
Was the course or activity actually published on the Tool?
For manual links, were the custom properties copied into custom parameters exactly?
Summary
Get the roles right and the rest of LTI 1.3 falls into place. The Tool hosts the content. The Platform launches it. The registration URL always travels from the Tool to the Platform. Most confusing setup failures are one of three things: the two roles reversed, a URL the other server cannot reach, or the published content’s custom property mixed up with the deployment ID. Decide the direction first, and you will avoid nearly all of them.
Solin specializes in Moodle integrations and LTI content delivery, connecting Moodle to other platforms in either direction, whether the other end is Moodle, another LMS, or a specialist content or assessment tool. If you need a setup configured or a stubborn launch error diagnosed, we can help.
Integrating external tools at scale? Solin offers Moodle integration services covering LTI, web services, and custom connectors, delivered as a fixed-price project.