Install Moodle on a VPS with Virtualmin/Webmin or the Command Line
Install a Moodle site on a VPS with DNS, Virtualmin or Webmin setup, Git deployment, config.php, cron, backups, monitoring, and command-line alternatives.
Tested scope: The Git examples below use Moodle 4.1 branch naming. Legacy compatibility notes cover Moodle 2.x on MySQL 8.
What you need
- Root or equivalent SSH access to the VPS
- Access to Virtualmin/Webmin if you use that workflow
- Access to the DNS provider for the domain
- A Git remote for the site code
- SMTP credentials for the site, or a Mailgun setup
1. Point DNS to the VPS
If the client already controls the final domain or subdomain, create
an A record that points to the VPS:
lms.example.com. IN A 198.51.100.42If you need a quick check from the shell, use:
dig +short lms.example.com
nslookup lms.example.com
If you manage the parent domain yourself, the same process works for a subdomain you host under that domain.
2. Create the vhost, Unix user, and database
Virtualmin/Webmin workflow
If you use Virtualmin/Webmin, the quickest workflow is:
- Create a new Virtual Server.
- Use the site subdomain as the administration username.
- Generate a strong password and store it in a password manager.
- Increase the default quota. A 1 GB quota is easy to forget and can break imports badly.
- If database creation fails, create it manually with
utf8mb4.
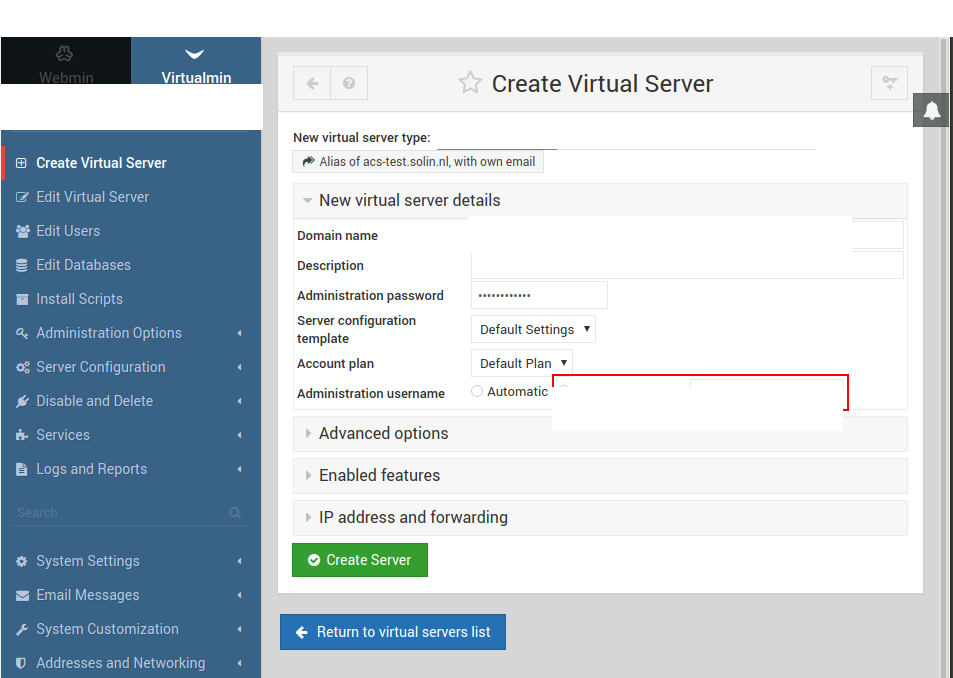
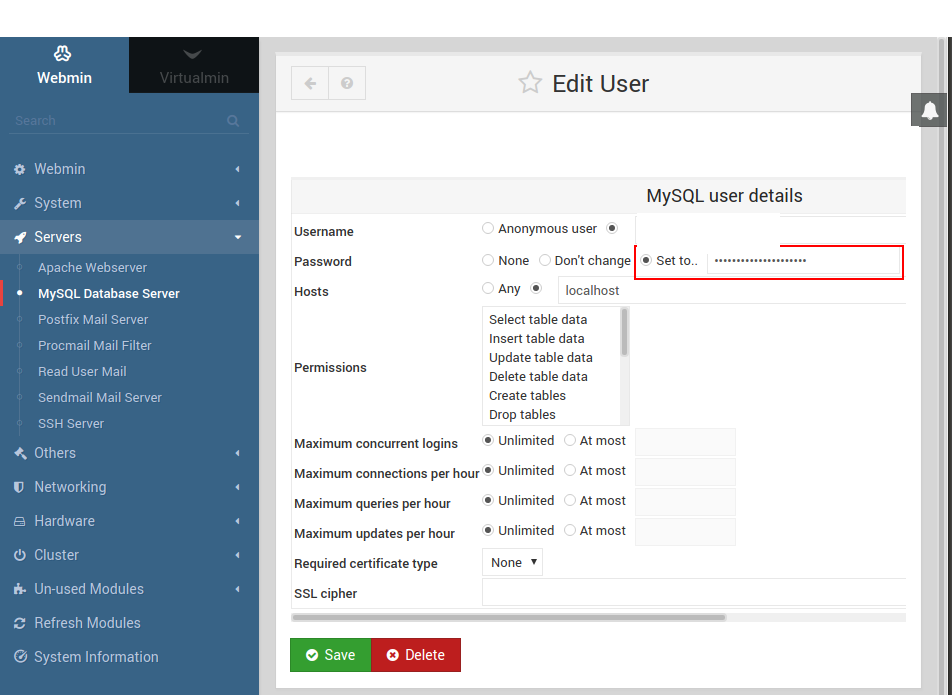
After the virtual server exists, open Webmin and set a real password for the MySQL user that matches the vhost Unix user.
If the quota is too low, large imports can fail hard enough to leave MySQL in a bad state. Check the quota directly:
quota -u moodleuserIf you need to create the database manually, use:
CREATE DATABASE moodle_db CHARACTER SET utf8mb4 COLLATE utf8mb4_unicode_ci;Command-line alternative
If you do not use Virtualmin/Webmin, create the Unix user, web root, database, and Apache vhost directly.
Create the Unix user and directories:
adduser --disabled-password --gecos "" moodleuser
mkdir -p /home/moodleuser/public_html
mkdir -p /home/moodleuser/moodledata
chown -R moodleuser:www-data /home/moodleuser
chmod 0755 /home/moodleuser/public_html
chmod 0750 /home/moodleuser/moodledata
Create the database and database user:CREATE DATABASE moodle_db DEFAULT CHARACTER SET utf8mb4 COLLATE utf8mb4_unicode_ci;
CREATE USER 'moodle_user'@'localhost' IDENTIFIED BY 'use-a-long-random-password';
GRANT ALL PRIVILEGES ON moodle_db.* TO 'moodle_user'@'localhost';
FLUSH PRIVILEGES;A minimal Apache vhost looks like this:
<VirtualHost *:80>
    ServerName lms.example.com
    DocumentRoot /home/moodleuser/public_html

    <Directory /home/moodleuser/public_html>
        AllowOverride All
        Require all granted
    </Directory>

    ErrorLog ${APACHE_LOG_DIR}/lms-example-error.log
    CustomLog ${APACHE_LOG_DIR}/lms-example-access.log combined
</VirtualHost>
Enable the site and reload Apache:
a2ensite lms.example.com.conf
systemctl reload apache2
3. Handle MySQL compatibility edge cases
Legacy authentication mismatch
If you are dealing with an older Moodle plus a newer MySQL server,
the database user may need mysql_native_password.
Add this to the MySQL server config:
[mysqld]
default-authentication-plugin=mysql_native_password
Then update the user:
ALTER USER 'moodle_user'@'localhost'
IDENTIFIED WITH mysql_native_password BY 'use-a-long-random-password';
Moodle 2.x on MySQL 8
If you are forced to run Moodle 2.x on MySQL 8, edit
lib/dml/mysqli_native_moodle_database.php and add explicit
aliases to the information_schema.columns query.
The source change starts like this in the SOP:
$sql = "SELECT column_name as `column_name`, data_type as `data_type`,
character_maximum_length as `character_maximum_length`, numeric_precision as `numeric_precision`,
numeric_scale as `numeric_scale`, is_nullable as `is_nullable`,
column_type as `column_type`, column_default as `column_default`,
column_key as `column_key`, extra as `extra`

FROM information_schema.columns
Apply the same pattern to every selected column in that query: each
field should use AS with the same column name as its
alias.
If you hit Unknown system variable 'storage_engine',
replace:
@@storage_enginewith:
@@default_storage_engineIn the original case, that replacement was needed in two places in the same file.
A remaining Undefined index: engine notice can usually
be ignored if full debugging is disabled.
Totara-specific note
If you are installing Totara instead of Moodle, make sure the database user can create the extra tables and indexes needed by Totara features such as Report Builder.
4. Put the code under Git
Git-based deployment is easier to repeat, review, and upgrade than
unpacking release tarballs directly on the server.
Add Moodle as an upstream remote:
git remote add upstream https://github.com/moodle/moodle.gitPull the required branch. For example, Moodle 4.1 LTS uses:
git pull upstream MOODLE_401_STABLE
git checkout upstream/MOODLE_401_STABLE
git switch -c moodle41
Then move the files into your main branch:
git checkout master
git checkout moodle41 .
Commit and push to your remote.
If you manage third-party plugins in Git as well, Git submodules are one workable pattern:
cd /path/to/your/moodle
git submodule foreach git pull
git commit -a -m "Plugin updates"
For Git-based deployment on the server, create an SSH key for the vhost Unix user and add the public key to the repository as a deploy key:
ssh-keygen
git clone git@github.com:your-org/your-moodle-repo.git public_html
chmod -R 755 public_html
chmod -R 700 .git
5. Install Moodle
Verify the domain resolves to the VPS. A bare
403 Forbidden from the new site is acceptable before the
code is in place.
If you are not deploying from Git, download Moodle on the server:
cd /home/moodleuser
wget https://download.moodle.org/download.php/direct/stable401/moodle-latest-401.tgz
mv public_html public_html.bak
tar -xf moodle-latest-401.tgz
mv moodle public_html
Copy the distributed config template:
cp public_html/config-dist.php public_html/config.phpThen edit public_html/config.php. Keep the file
structure Moodle ships with; only replace the relevant values:
$CFG->dbtype = 'mysqli';
$CFG->dblibrary = 'native';
$CFG->dbhost = 'localhost';
$CFG->dbname = 'moodle_db';
$CFG->dbuser = 'moodle_user';
$CFG->dbpass = 'use-a-long-random-password';
$CFG->prefix = 'mdl_';
$CFG->dboptions = array(
    'dbpersist' => false,
    'dbsocket' => false,
    'dbport' => '',
    'dbhandlesoptions' => false,
    'dbcollation' => 'utf8mb4_unicode_ci',
);
$CFG->wwwroot = 'http://lms.example.com';
$CFG->dataroot = '/home/moodleuser/moodledata';
Apply ownership and permissions:
chown -R moodleuser:www-data public_html
chmod -R 0755 public_html
chown -R moodleuser:www-data moodledata
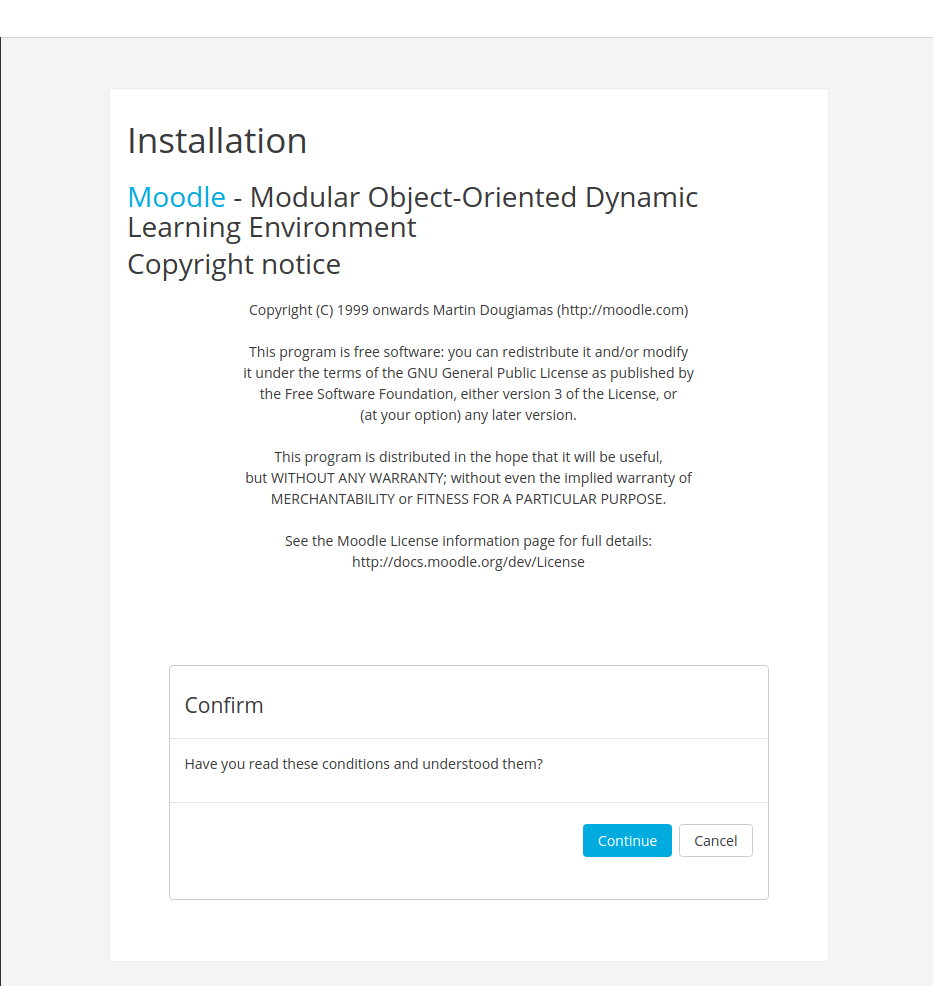
chmod -R 0750 moodledataNow load the site in the browser and finish the Moodle installer.
A practical handover pattern is:
- Create a separate customer admin account instead of leaving everything on the bootstrap admin.
- Use a role-based mailbox where possible.
- Add that new account to
Site administration > Users > Site administrators.
6. Configure outgoing mail
In Moodle, go to
Site administration > Server > Outgoing mail configuration.
Two common options are:
- Use the customer’s SMTP service.
- Or set up Mailgun and configure Moodle to relay through it.
If you use Mailgun, pair this guide with the Mailgun guide in the same batch.
7. Raise upload limits
Raise upload limits to 1000 MB in three places:
php.ini:post_max_sizeandupload_max_filesizeSite administration > Security > Site security settings- Plugin-specific settings such as file submissions in assignments
That detail is easy to miss and matters for real Moodle rollouts.
8. Turn off automatic update notifications
If you do not want Moodle mailing upgrade notices directly to the client, disable:
Site administration > Server > Update notifications > Automatically check for available updates
9. Enable Apache X-Sendfile for large file delivery
On larger Moodle sites, Apache X-Sendfile is a practical performance improvement.
Install and enable the module:
apt update
apt install libapache2-mod-xsendfile
a2enmod xsendfile
service apache2 restart
Add this to the Apache vhost:
<IfModule mod_xsendfile.c>
    XSendFile on
    XSendFilePath /home/USERNAME/moodledata
    XSendFilePath /home/USERNAME/public_html
</IfModule>
Reload Apache:
service apache2 reloadAdd this to config.php before Moodle includes the setup
bootstrap:
$CFG->xsendfile = 'X-Sendfile';
$CFG->xsendfilealiases = array();
Test the feature with a tiny probe:
<?php
header("X-Sendfile: /home/USERNAME/moodledata/xsend-test.txt");
header("Content-Type: text/plain");
header("Content-Disposition: inline; filename=\"xsend-test.txt\"");
exit;
Create the file and call the probe:
echo "hello xsendfile" > /home/USERNAME/moodledata/xsend-test.txt
curl -i https://lms.example.com/xsendtest.php
10. Schedule cron
In Moodle, go to
Site administration > Site policies.
If you use browser-based cron:
- Disable
Cron execution via command line only - Set a strong cron password
- Do not use special characters in that password if you are going to pass it in a query string
Then test the URL:
http://lms.example.com/admin/cron.php?password=replace-with-your-cron-passwordThe original Webmin-based example used a command like this:
wget -q -O /dev/null http://www.example.com/admin/cron.phpWebmin-based HTTP cron
If you manage cron in Webmin, create or clone a scheduled job that
calls the new site’s cron URL, then replace the old site URL in the
Command field with the new one.
Command-line alternative
For modern installs, prefer CLI cron:
crontab -u moodleuser -eAdd:
*/1 * * * * /usr/bin/php /home/moodleuser/public_html/admin/cli/cron.php >/dev/nullThat avoids exposing cron over HTTP entirely.
11. Configure backups
backupvhost.php
example workflow
One workable pattern is a differential backup script run by a
dedicated backupvhost Unix user. The script can be called
like this:
/usr/bin/php7.2 /home/backupvhost/scripts/backupvhost.php \
  --config="/home/{unix-user}/public_html/config.php" \
  --hostname="{source-hostname}" >/dev/null
For example, the backup target path can look like this:
backup@example-backup-host:/users/backup/{hostname}_server_backups/{dbname}/{dbname}.backup_day{backupday}.tar.gz.gpgKeep one additional full backup in the rotation so the previous incremental chain can still be restored.
To install this on a new server:
- Create a
backupvhostUnix user. - Add that user to the vhost Unix user’s secondary group.
- Generate an SSH key pair for
backupvhost. - Install the backup script into
/home/backupvhost/scripts/. - Create
/home/backupvhost/backup/. - Add the public key to the destination host.
- Run a very small
scptest and accept the host key prompt. - Create the destination folder for each vhost database.
- Test the script manually.
- Run it daily as
backupvhost.
The expected folder layout is:
/home/backupvhost/scripts/backupvhost.php
/home/backupvhost/backup/
The backup user also needs read access to the site data:
usermod -a -G www-data backupvhost
chmod -R g+rX /home/moodleuser/moodledata
Test the script manually before scheduling it:
su backupvhost
/usr/bin/php7.2 /home/backupvhost/scripts/backupvhost.php \
  --config="/home/{unix-user}/public_html/config.php" \
  --hostname="{source-hostname}" >/dev/null
Simple database dump script
For smaller installs, a plain mysqldump script is still
useful:
#!/bin/bash
## location: /home/moodleuser/db-backup/moodleuser-backup.sh

mysqldump --single-transaction -umoodleuser -p[secret_password] moodle_db \
  | gzip -c > /home/moodleuser/db-backup/moodle_db.sql.gz
It also includes the matching daily cron entry:
@daily /home/moodleuser/db-backup/moodleuser-backup.sh12. Add monitoring
Monitor the site from a different server, not from the same host
being monitored. One way to do that is Webmin’s
System and Server Status with a remote HTTP monitor and a
10 second timeout.
The exact tool matters less than the check itself: monitor the public site externally and alert on both downtime and unacceptable response time.
13. Hand over the site
Once the build is complete, hand over:
- The site URL
- The Moodle admin username
- The Moodle admin password
- Any additional credentials the client should hold
Store the Unix, database, SMTP, and Moodle admin credentials in a secure team-managed secret store and avoid leaving them only in personal notes.
Need help with a Moodle deployment or infrastructure review? Contact us.
Solin specializes in Moodle hosting, deployment, monitoring, and operational handover for self-hosted environments. Need help? Contact us.
Contact us